Damn ACE juice in the keyboard of my MacBook 12″ 2016 retina!!!
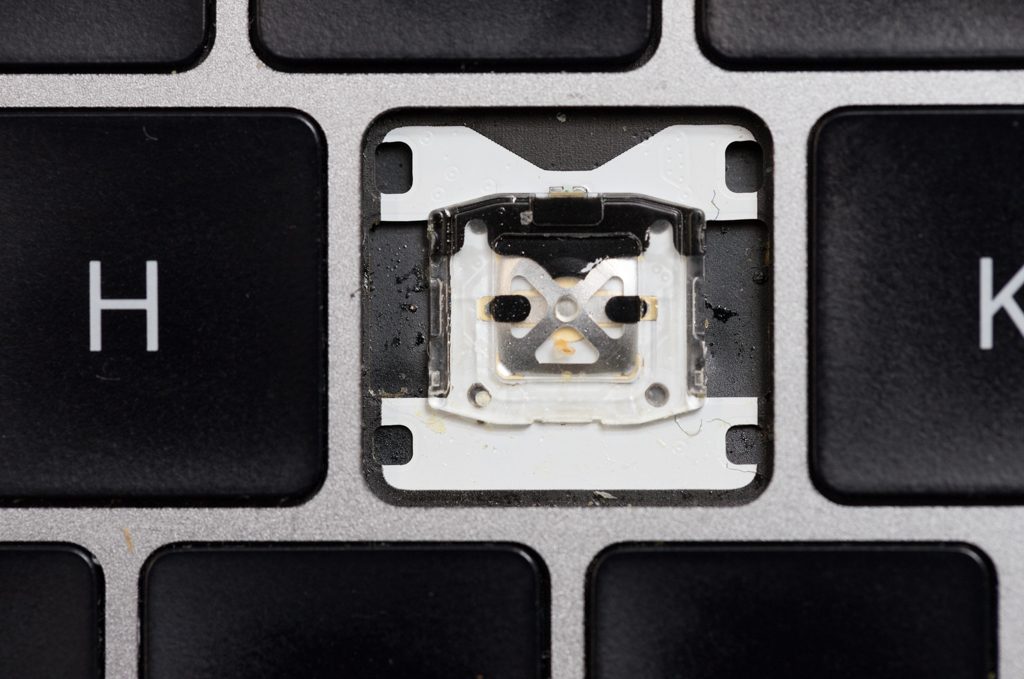
A careless moment and the juice was on and inside the keyboard. I immediately turned the device around and let the liquid run off, but there was still enough of it in the keyboard so that the keyboard didn’t recognize any keystrokes at first. The first shock died quickly when some keys reacted again. But after some time it turned out that all keys worked again but the sugar from the juice in the keys made sure that some keys just got stuck.
So how do you get the keys cleaned?
Reports on the internet describe that the butterfly keyboards of the MacBooks can’t be repaired and you have to change the whole keyboard. At least I was able to remove the normal keys and clean the mechanism underneath.
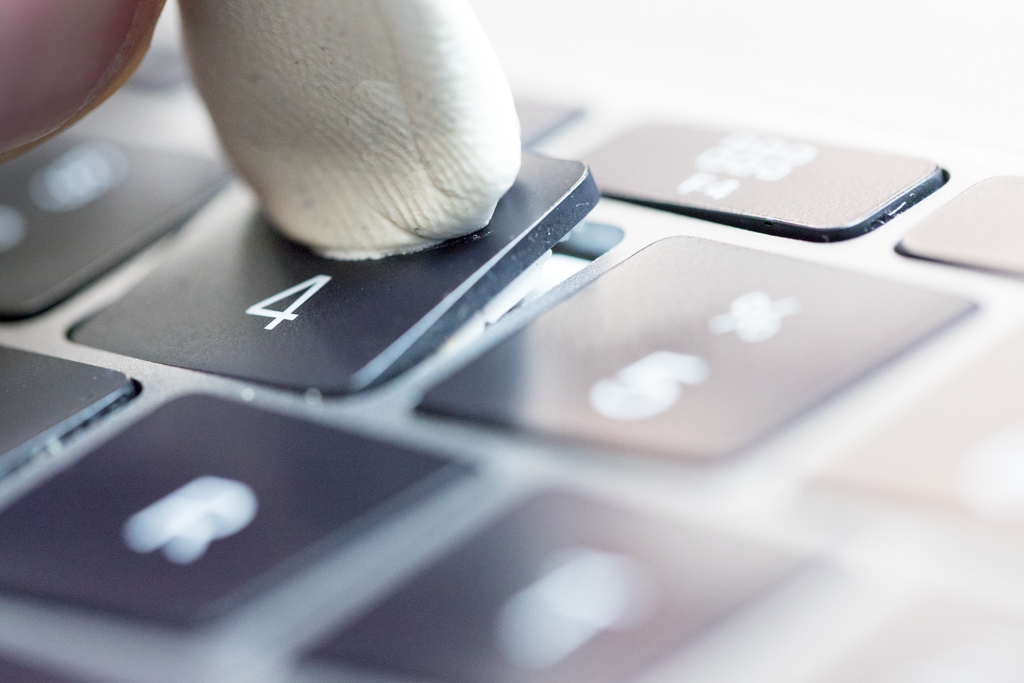
Many people use pointed objects to lever up the keys. But I was afraid to scratch the aluminium or the key with it and then I had the idea to pull the keys out with Uhu Patafix which works amazingly well if you pay attention to one important thing.
Ideally you have a spatula from an IFixit kit at hand.
Attention, I only describe my experiences here and you take the responsibility for any damage that may occur to you during the action. If you’re unsure, you’d better take the device to an Apple Repair Shop. The Butterfly keys are extremely sensitive and can be damaged.
I glue the Patafix in the upper third of the key and slowly drag the upper part of the key upwards.
Patafix on the upper part of the button 
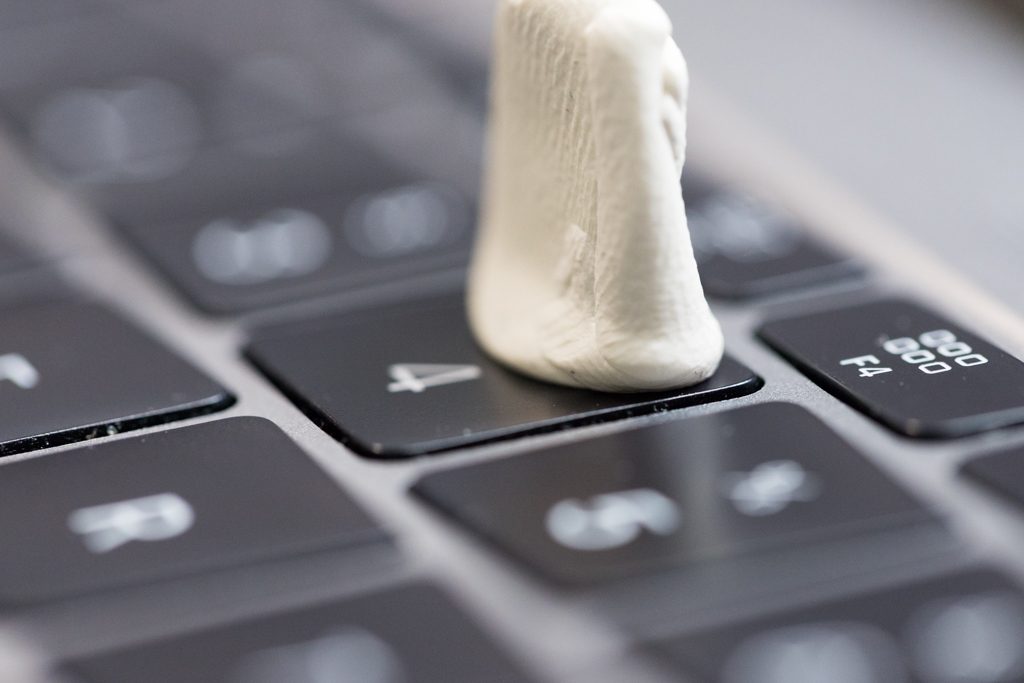
Carefully pull off the button at the top.
Jetzt kann es passieren, dass sich entweder die Kappe inklusive des Butterfly Mechanismus löst oder nur die Kappe.
Now it can happen that either the canopy including the butterfly mechanism loosens or only the canopy.
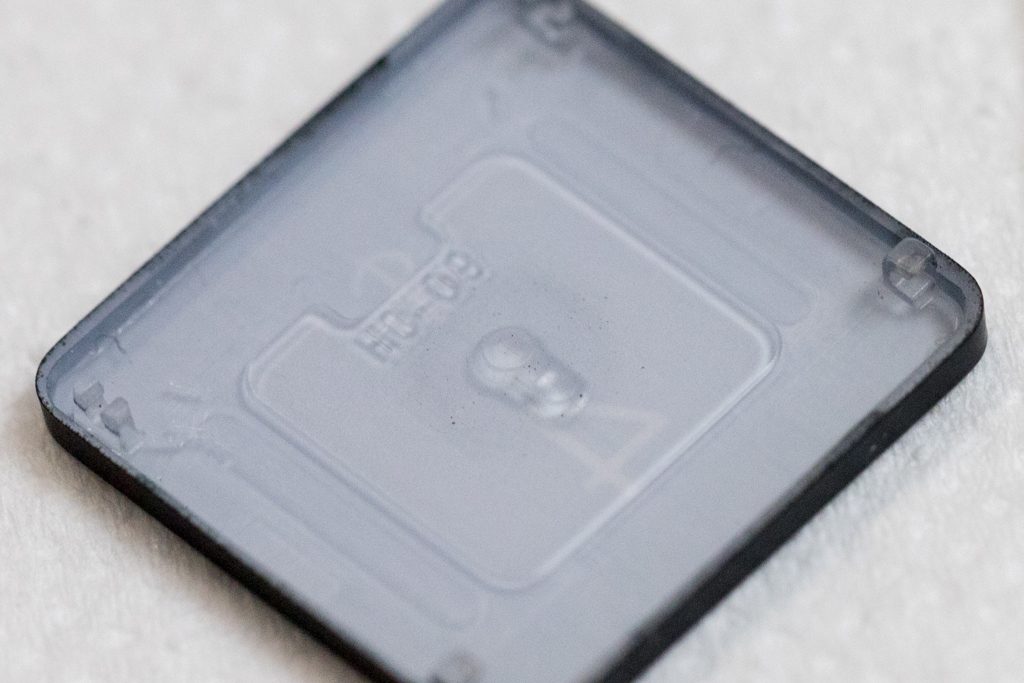
Only the upper part of the cap comes loose.
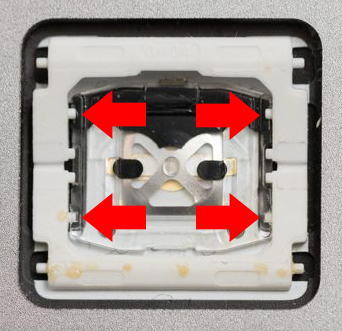
The cap has two clips at the top and two hooks at the bottom. First the two clips have to release at the top, then in the second step the button at the bottom can be carefully released from the hooks. First one side, then the second. You already have the cap of the key in your hand.
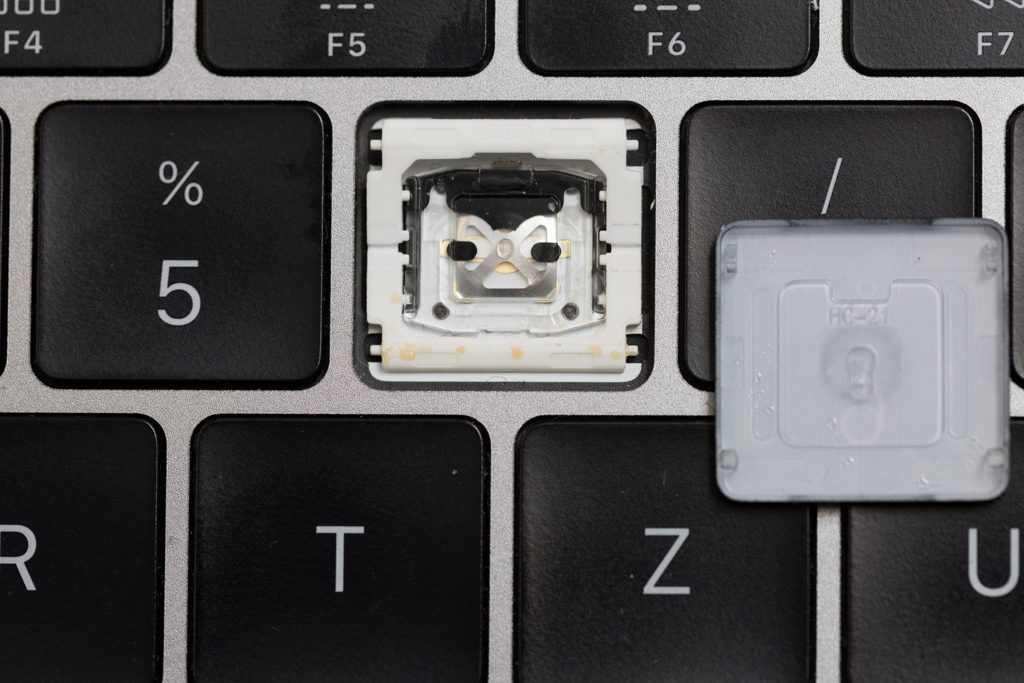
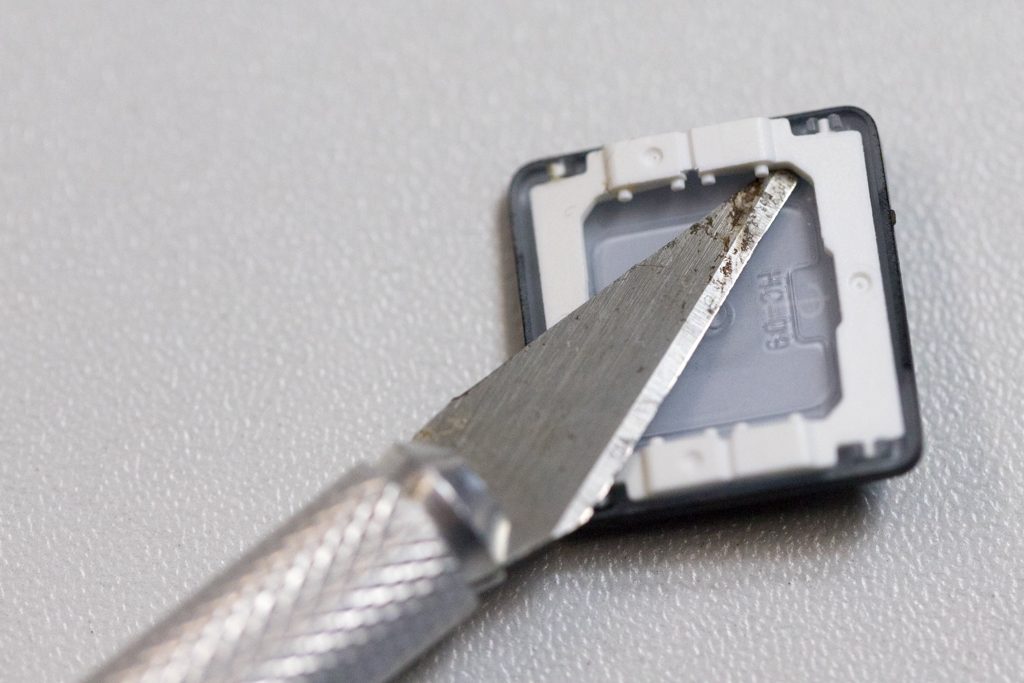
Now you have to release the butterfly mechanism from the keyboard. I took a pointed object and loosened the mechanism first on one side and then on the other. You already have it in your hand. I always put the pointed object next to the inner pins and slowly levered off the butterfly mechanism.
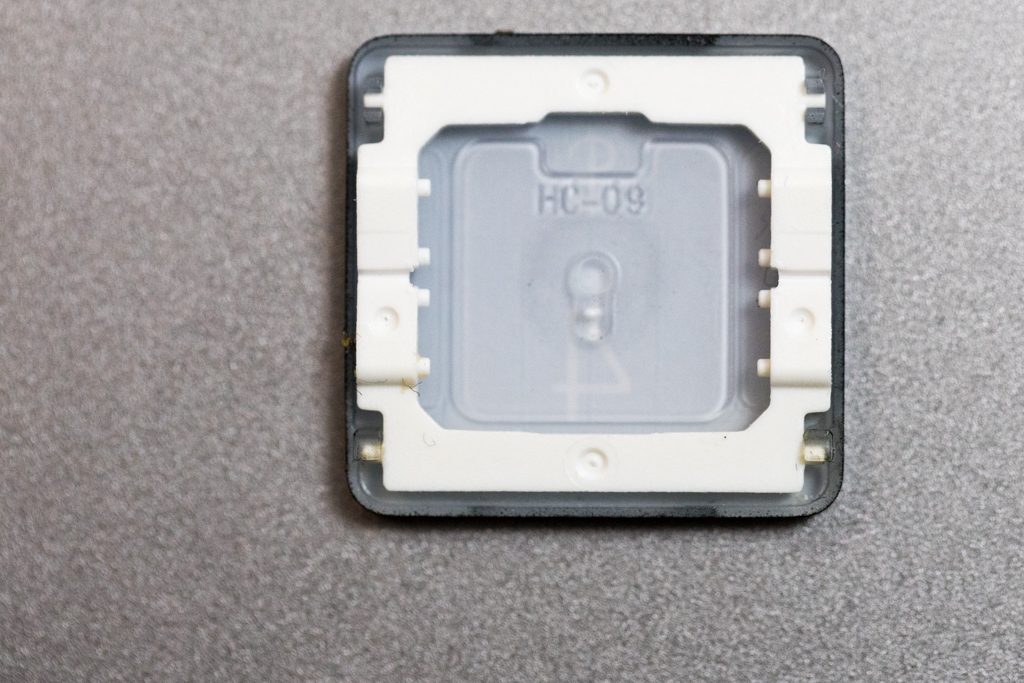
The cap with butterfly mechanism comes loose
Once you have the cap and the mechanism in your hand, you can first loosen the two clips with a pointed object and then loosen the mechanism from the hook. Once the clips have been released, the mechanism simply slips out of the hooks. No power necessary! The order is important – you don’t want to break anything.
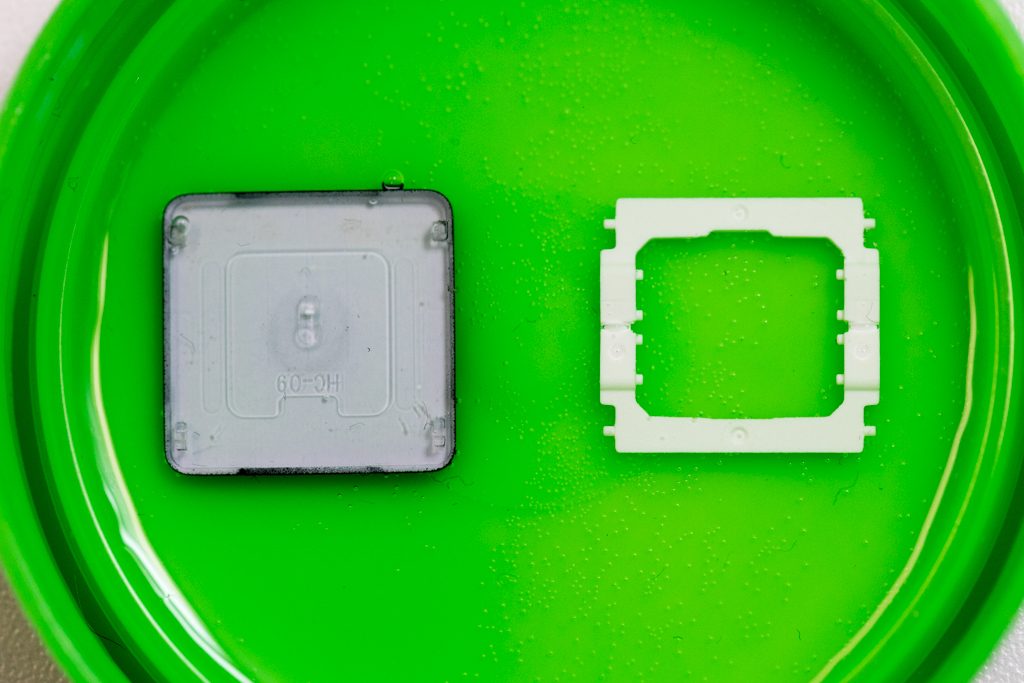
I placed the button and the mechanism in normal water for a few minutes and then carefully cleaned and dried them.

During this time I cleaned the trough of the button with a slightly damp cotton swab and then dried it again with a dry cotton swab.
glued interior 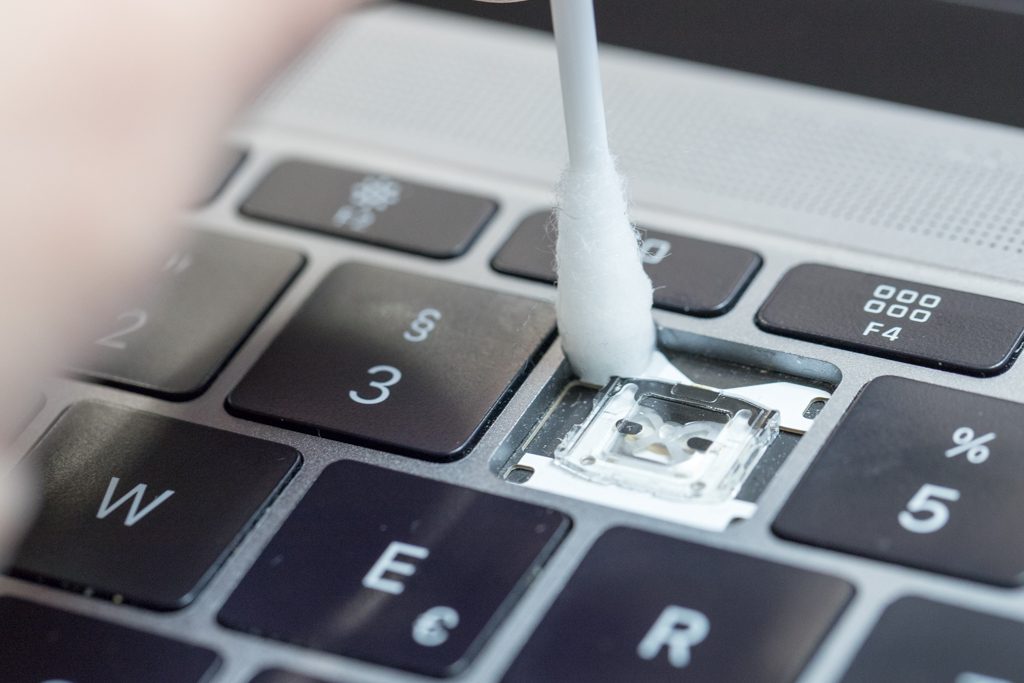
wipe with a cotton swab
Reinsert the butterfly mechanism on one side and carefully push it in on the other side.
Attention, the butterfly mechanism must be inserted RIGHTly around, the notch upwards and the side with the bevelled surface downwards (towards the ground).
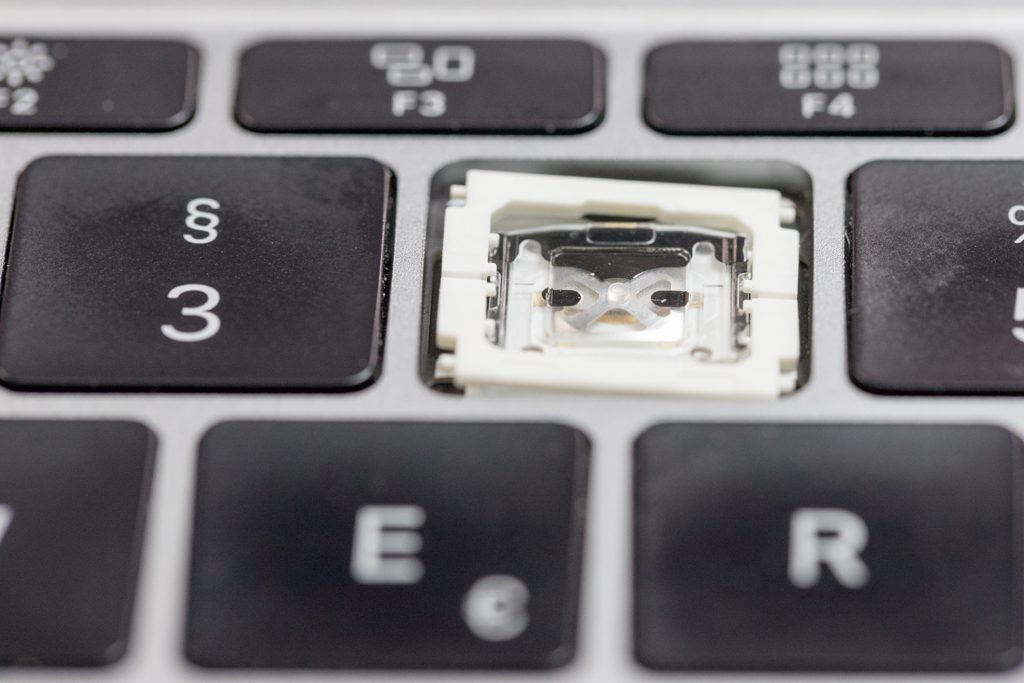
First insert the butterfly mechanism on one side (here on the right).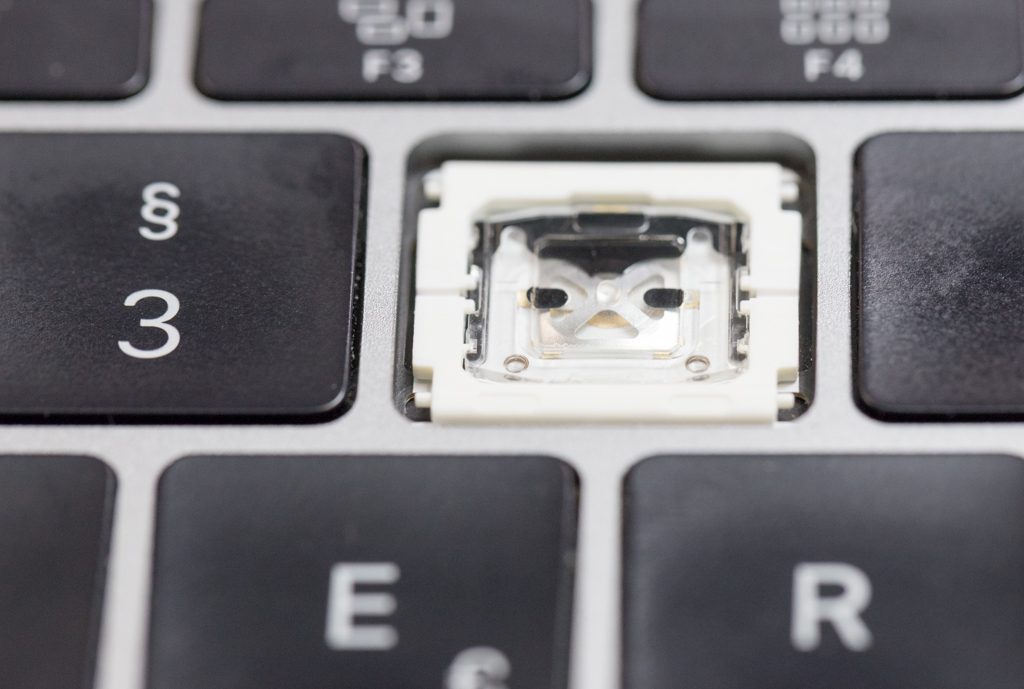
Dann den Butterfly Mechanismus auf der zweiten Seite einsetzen (hier links)
The key can now be inserted at the bottom again (no effort required, just put it down). Then it can be pressed in at the top *click* *click*
Tip for keys where the orientation is not quite clear, e.g. the “I” and the “O” or “N”: There is a notch on the back of the key. Notches belong up!
Thread the cap down first. 
Then press the cap in at the top *click* *click*
Per key I needed approx. 5min. I cleaned letters, numbers, special character keys and a command key.
One reads reports of the fact that the space bar cannot be solved without destruction, which is super annoying, but in my case was not necessary either.
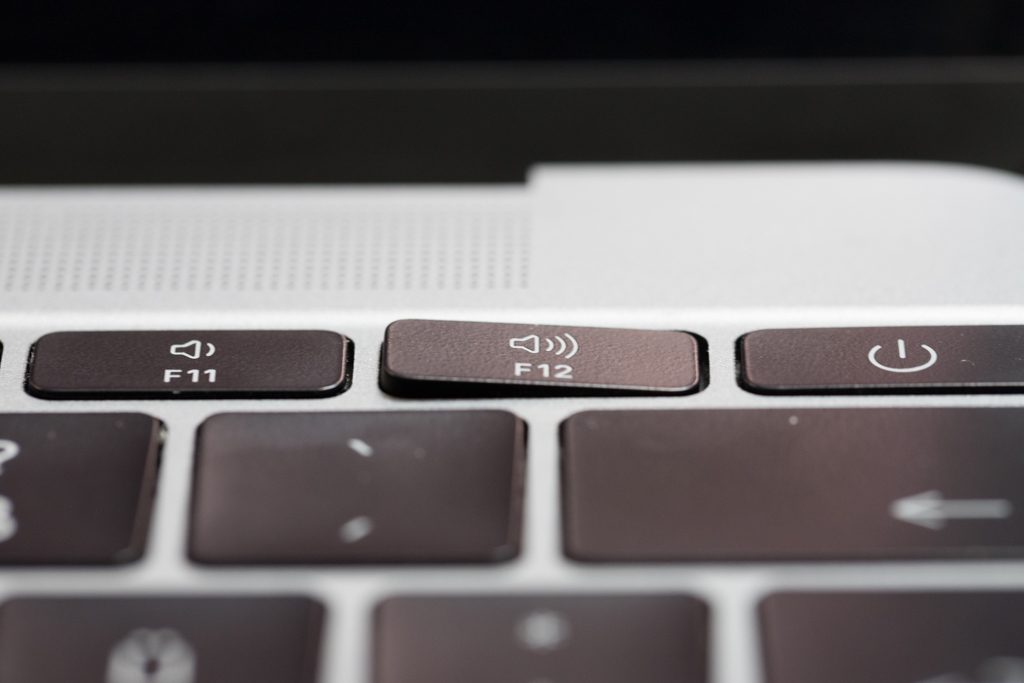
I also had to remove some function keys but here I sweated a lot when I removed the butterfly mechanism. These things are damn filigree and feel super sensitive.
Note that the clips are on the left and the hooks are on the right. Therefore, first lift the keys to the left.
The detached function key (clips left, hook right) 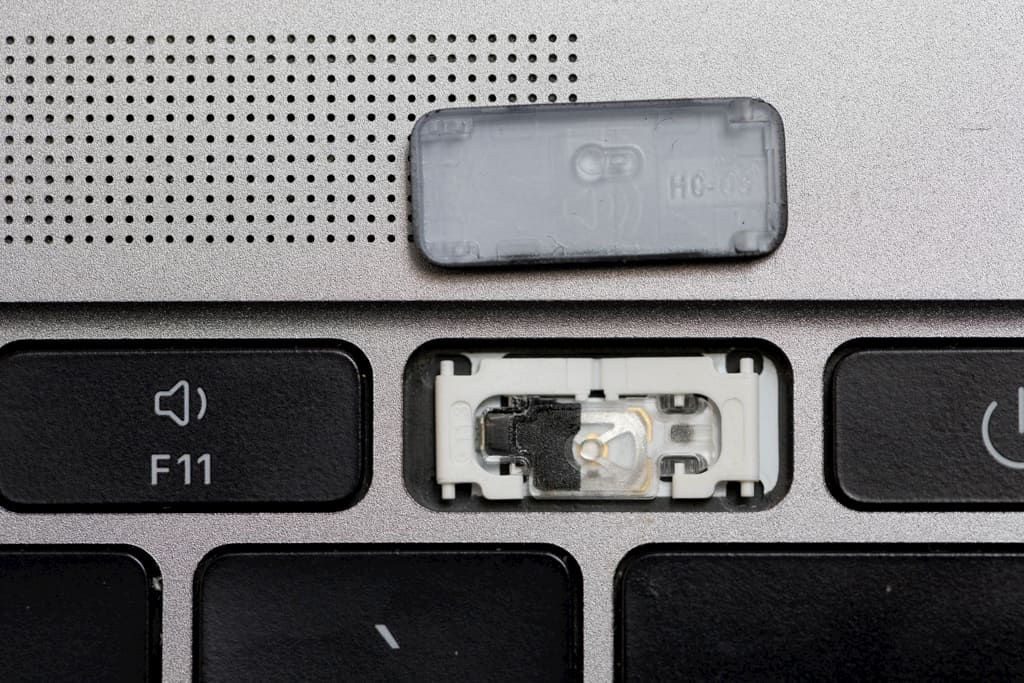
The detached function key (clips left, hook right)
If it is somehow possible, clean the butterfly mechanism without removing it. The thin membrane in the middle holds the butterfly mechanism together and looks super sensitive. During installation and removal you run the risk of breaking the thing apart in the middle.
I have removed and cleaned about 15 keys and the keyboard feels normal again.
Works for me.
[…] Source: MacBook Butterfly Keys / Clean Keyboard – Konkludenz […]
[…] Source: MacBook Butterfly Keys / Clean Keyboard – Konkludenz […]
[…] Source: MacBook Butterfly Keys / Clean Keyboard – Konkludenz […]
[…] Source: MacBook Butterfly Keys / Clean Keyboard – Konkludenz […]