If you want to calibrate Canon lenses in their sharpness, you only have the possibility to do this in the Canon camera menu. But there is a controller with which one can make a general correction for all focal lengths and distances.
Now I have bought two Sigma lenses and Sigma provides with the Sigma USB Dock a tool with which correction profiles for the lenses can be adjusted for different distances and focal lengths.

In the beginning, I found it very difficult to calibrate. I downloaded a focus detector from Traumflieger.de, printed it out, cut it out and set it up. Unfortunately this was quite a fiddling and the Focus Detector with its layout is not suitable for calibrating lenses for longer distances.
My solution was first of all to display the focus detector enlarged on my notebook display and to position the display at a 45° angle to the lens.
I noticed that an effect you don’t want to have when filming and photographing is extremely helpful for calibrating the lenses.
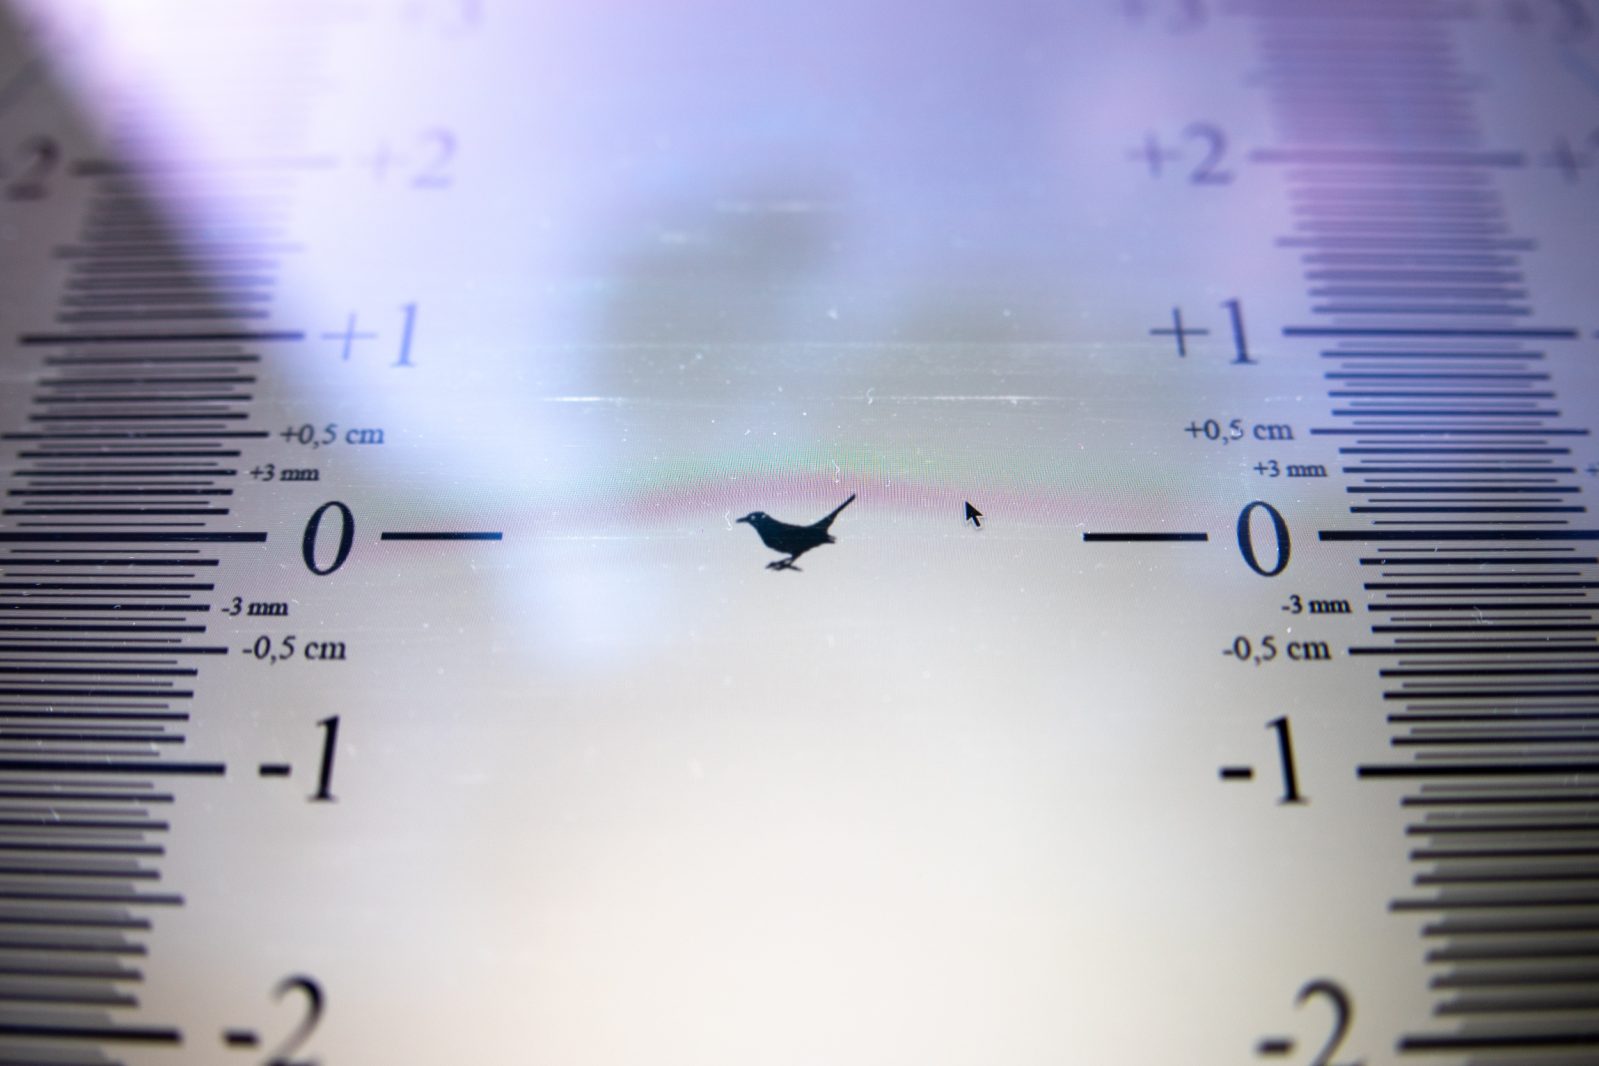
Moiré–Effect

Moiré effect with minimal back focus
The Moiré effect occurs when two grids are superimposed. On the one hand the pixels on the notebook display and on the other hand the pixels on the image sensor of the camera.
In part you can already see on the small display of the camera in the normal view where the degree of sharpness is.
Correction at short distances
After I noticed that computer displays are quite well suited, I simply created a pattern on a white background in an image processing program on which I focused at a 45° angle with open aperture and the viewfinder autofocus. The shot image shows super fast whether the focus is in front of or behind the focus point.
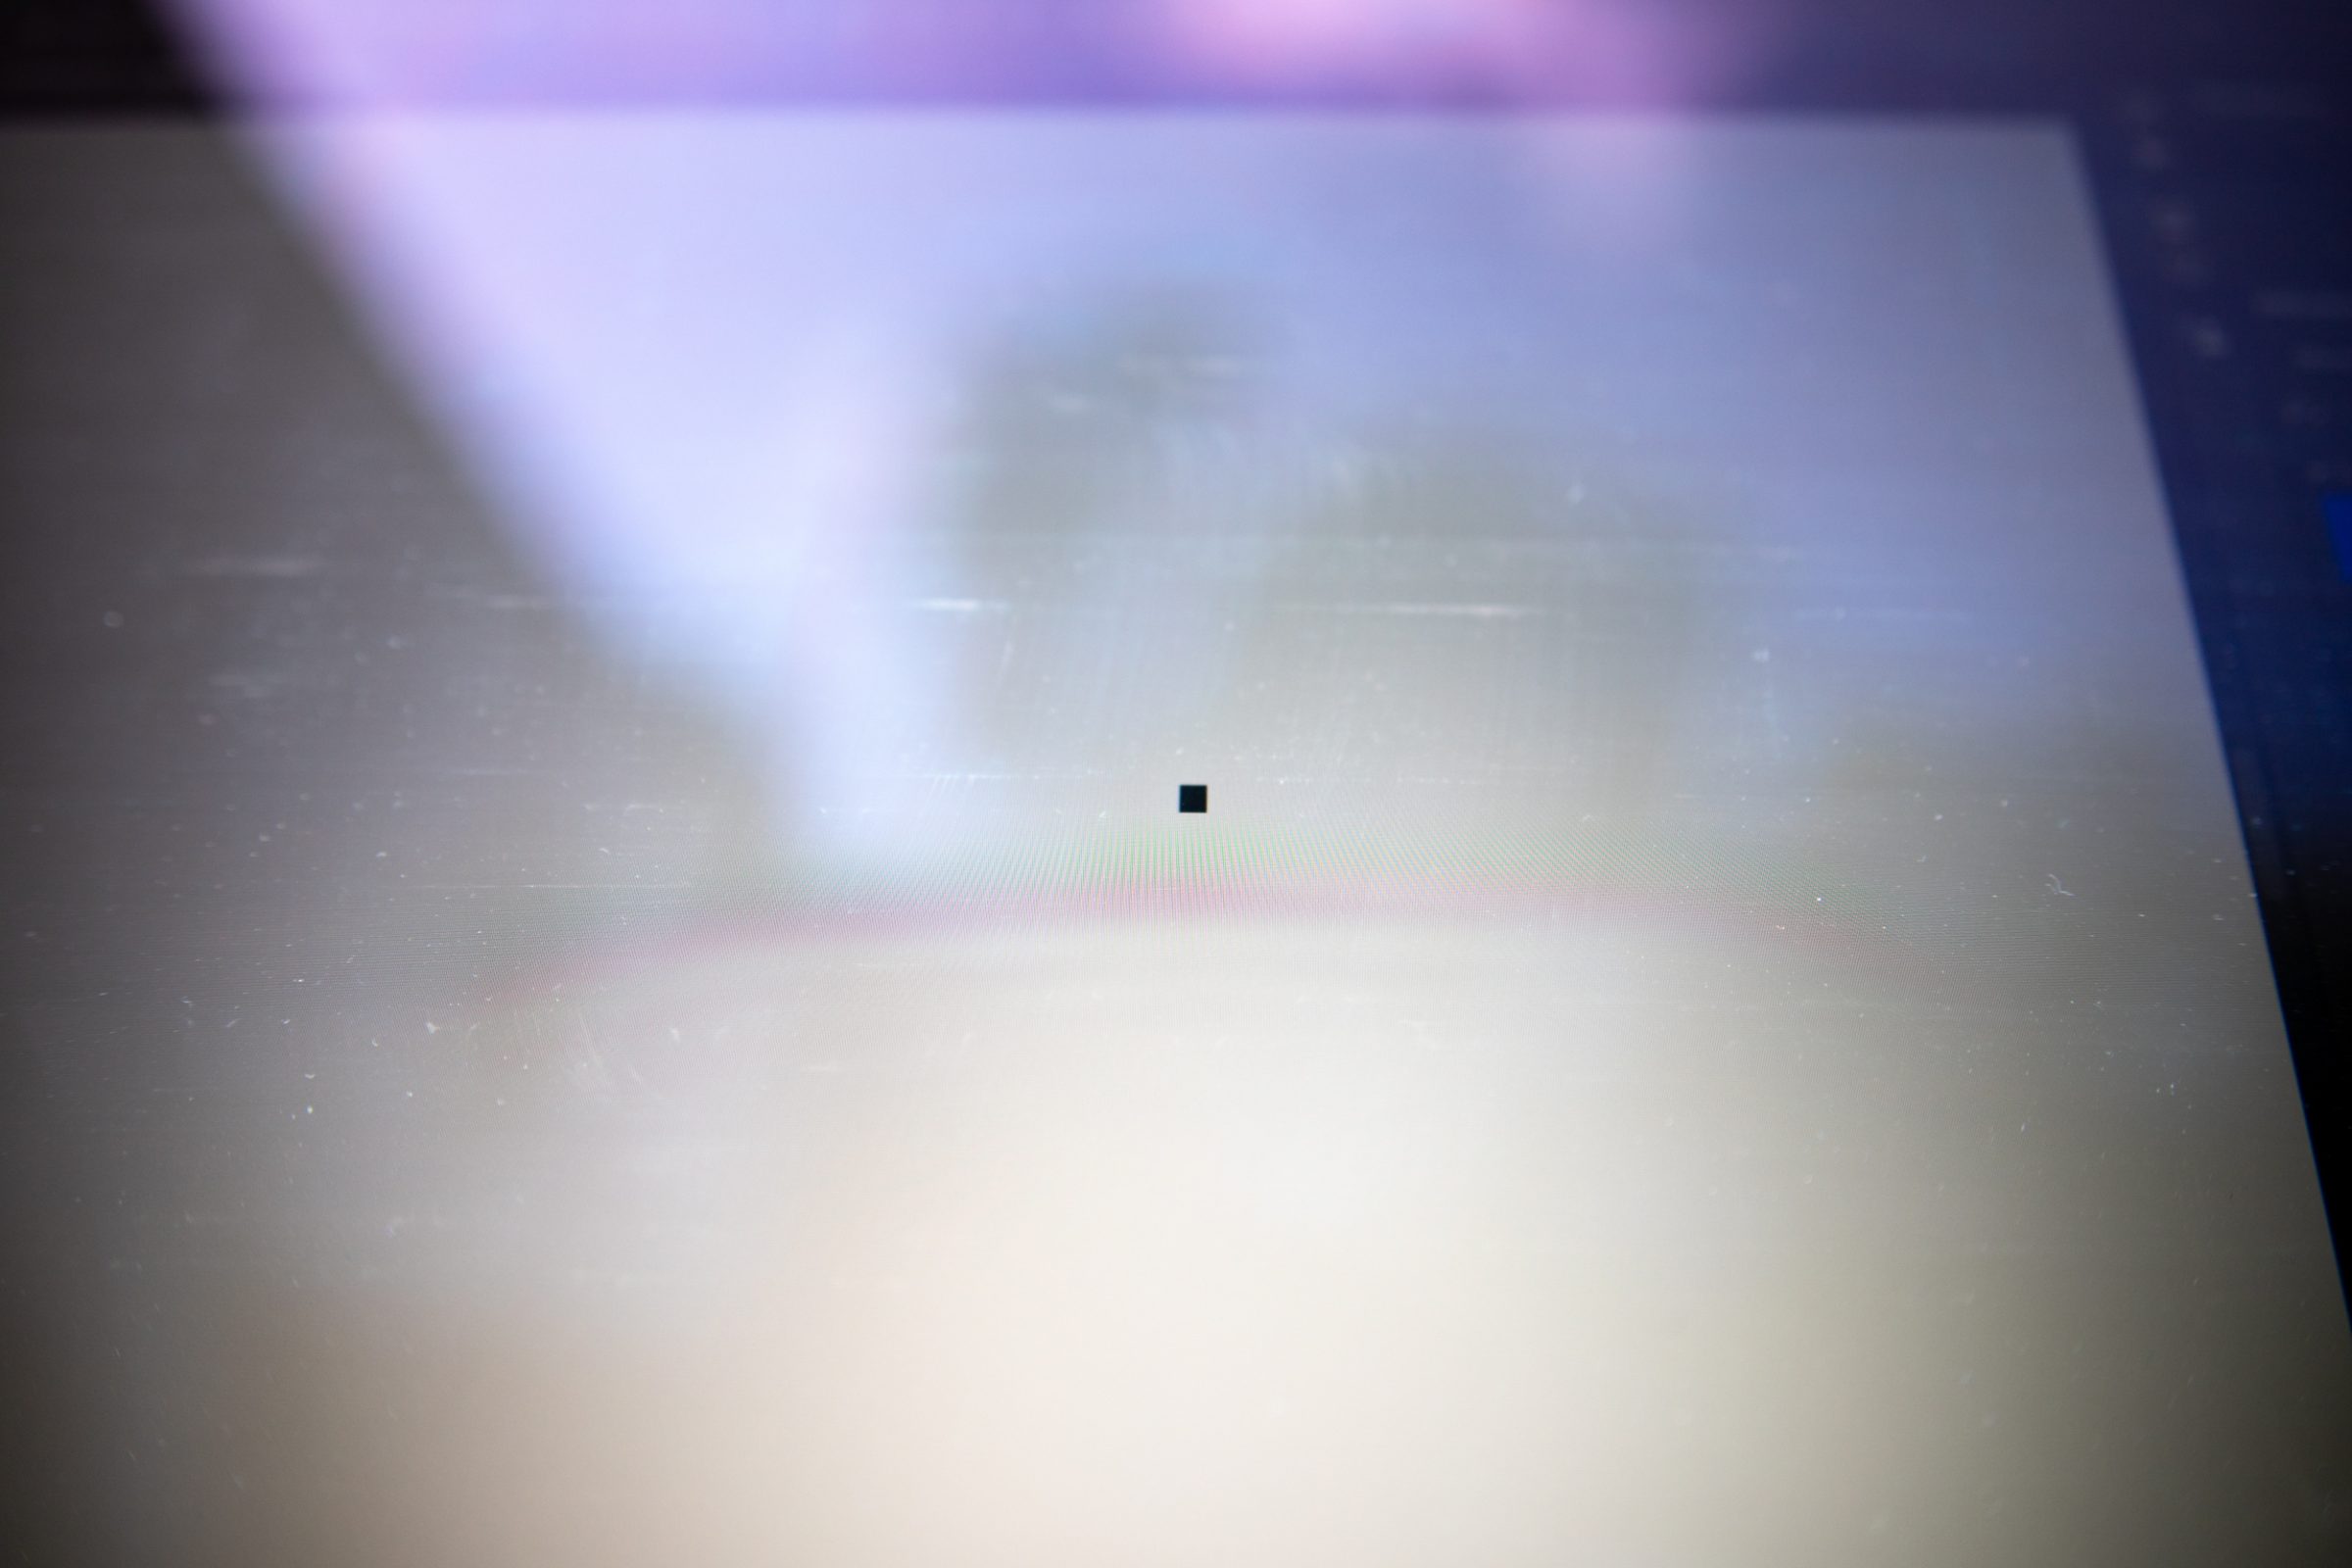
Front focus on the Retina notebook display
Correction to infinity
But at a certain distance I had problems with the “display method” because the lenses can no longer resolve so high that the moiré effect appears.
My solution for this problem was the Canon EOS Utility 3. If you connect the camera with the PC/MAC you get a live view in the EOS Utility 3 in which you can adjust the focus of the lens with two buttons in the program.
I choose the most distant object in the area, which stands out well against the sky. In my case, I chose an antenna on one of the neighbouring roofs as the focus object.

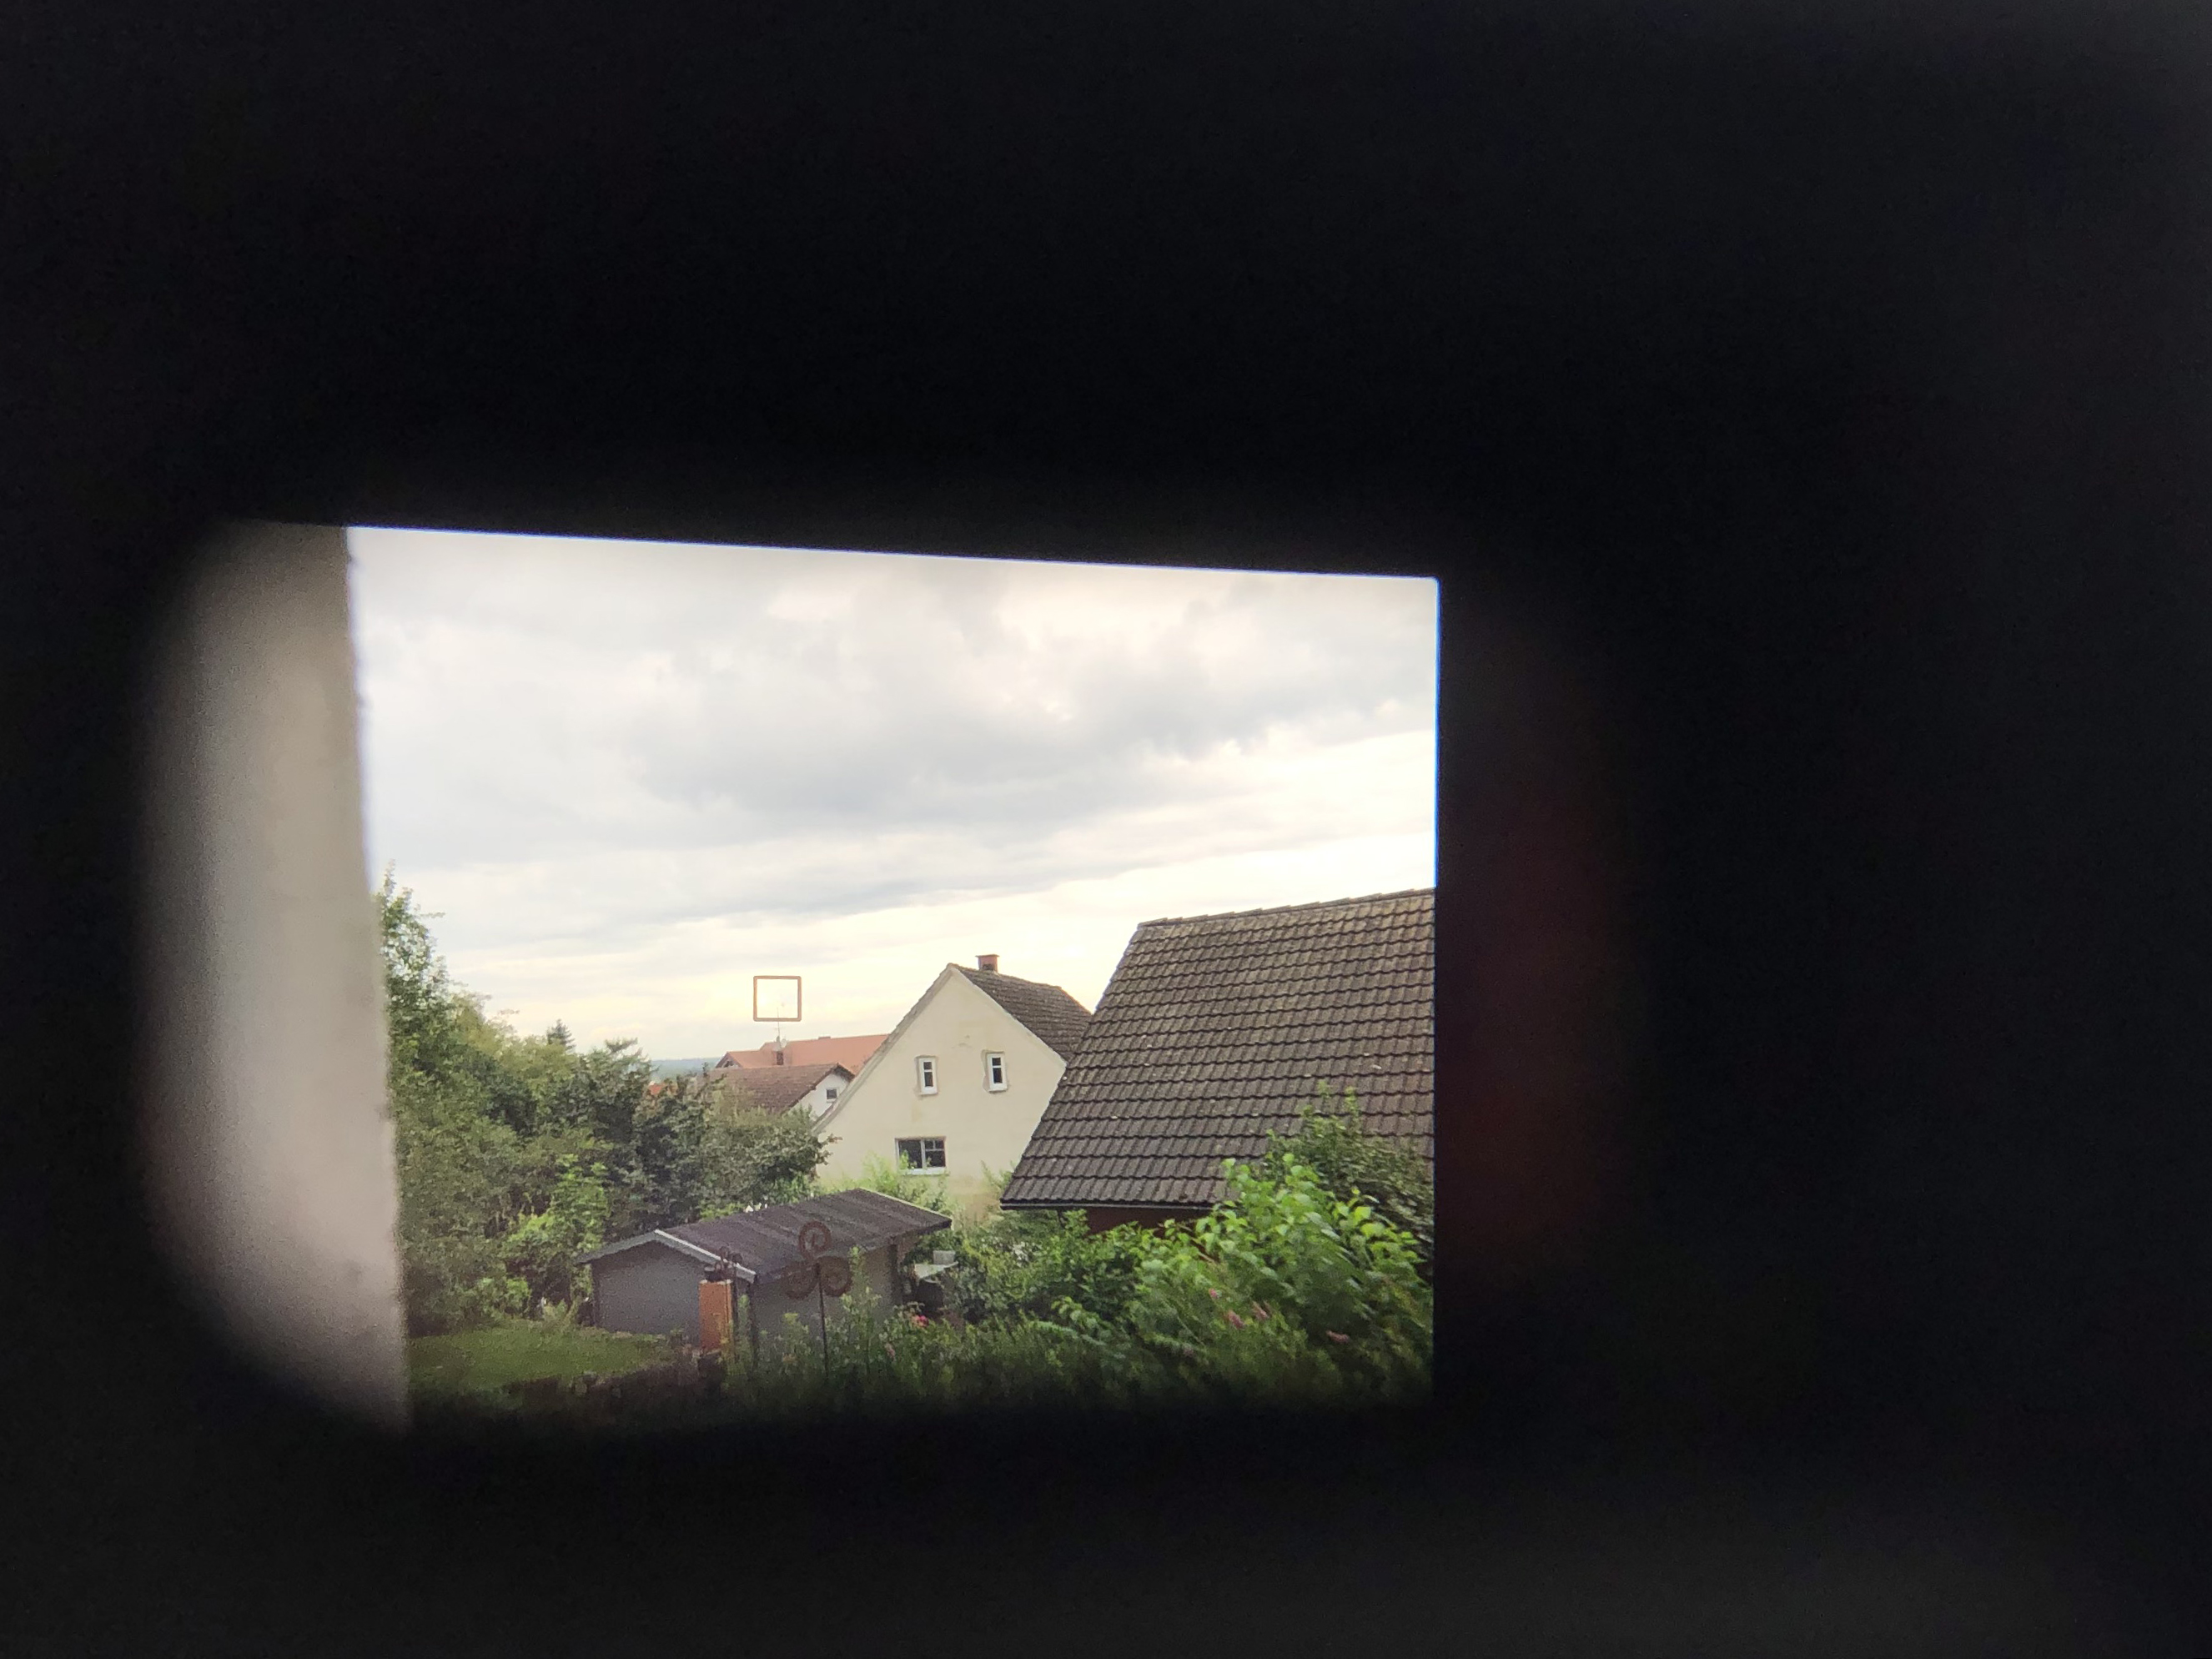
The center viewfinder AF point is pointed at the antenna and the shutter release button is touched once to focus the lens.
Afterwards I switch the camera to Life-View (the focus is not changed)
In the Canon EOS Utility 3 I now see the following image in the 10X magnification:
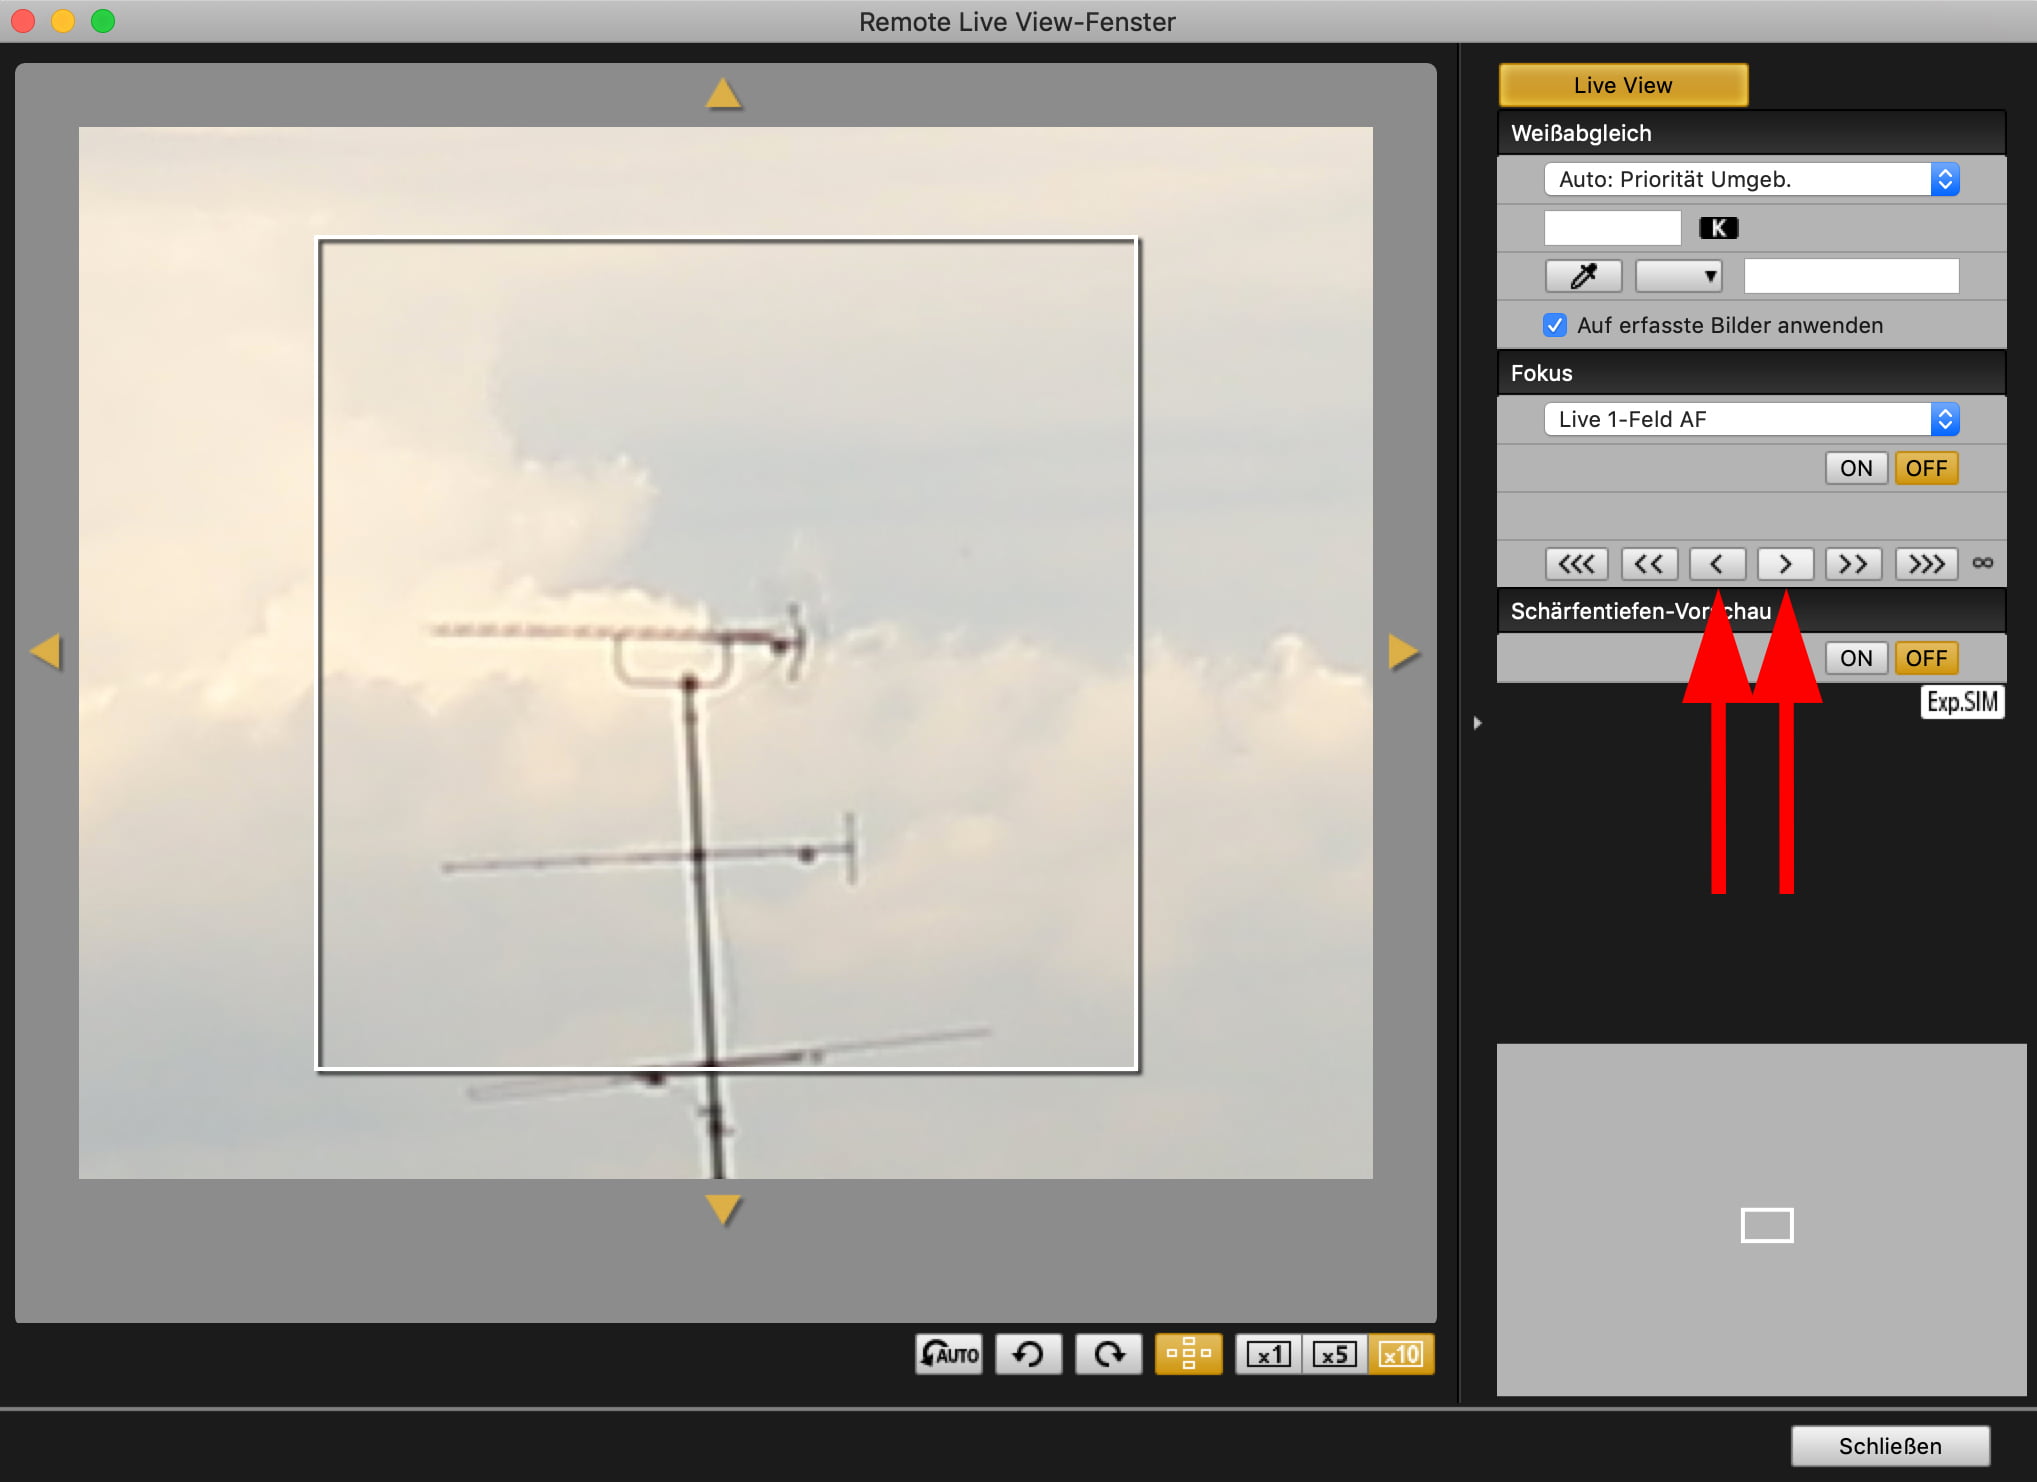
With the two middle focus buttons I can now move the focus minimally.
Each time I press in one direction, I observe whether the antenna becomes sharper or fuzzier.
If I move the focus in EOS Utility 3 towards infinity to make it sharper (right arrow) I also have to correct the focus in Sigma Optimizazion Pro towards infinity.
In between, deactivate the Live View again and let the camera focus and test again in the other direction.
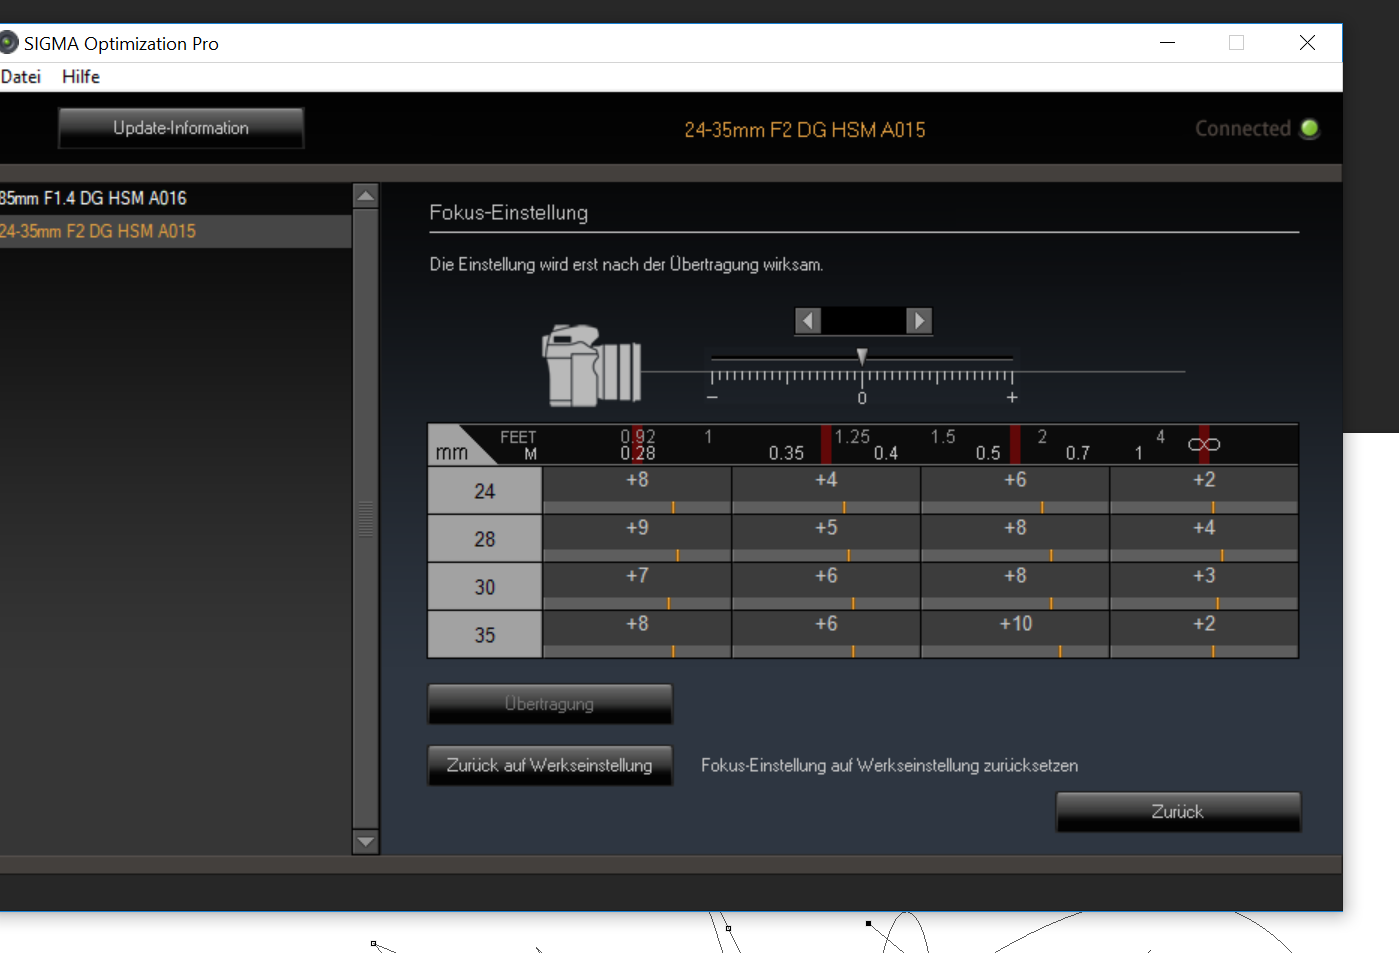
I write down the corrections for each calibratable distance and parameterize the lens afterwards with the Sigma program after.
The goal is that the manual shift of the focus only worsens the sharpness and does not improve in either direction. Then you have found the optimal point.
Here you can see my correction tables for two Sigma lenses.

Meanwhile, I would say that a fixed focal length lens can be calibrated in 30 minutes and a zoom lens in just over an hour.