This is a follow up from the first article: Fenix TFT Wifi Thermostat API reverse engineering for Home Assistant with Node Red That is the basis for this article. This is about setting the temperature of one or more Fenix TFT Wifi thermostats with Node-Red. The source code for Node-Red can be found below.
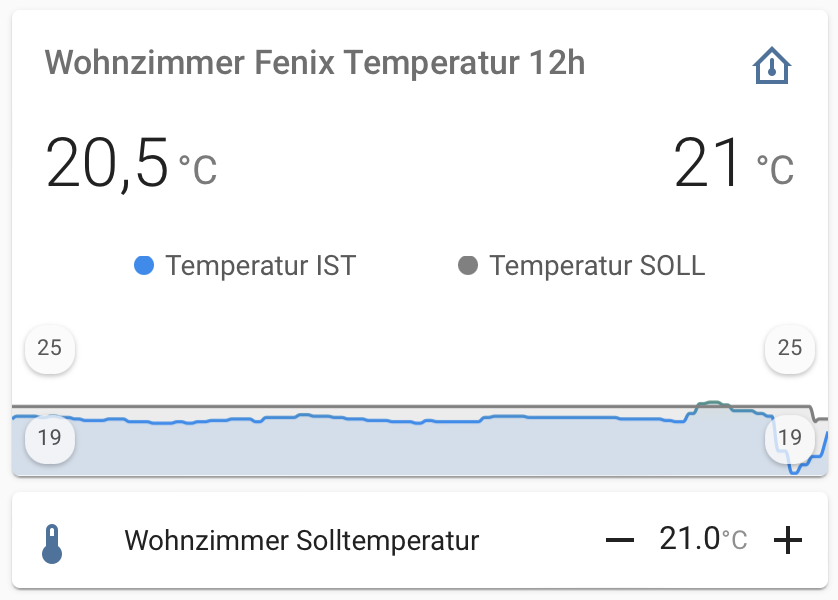
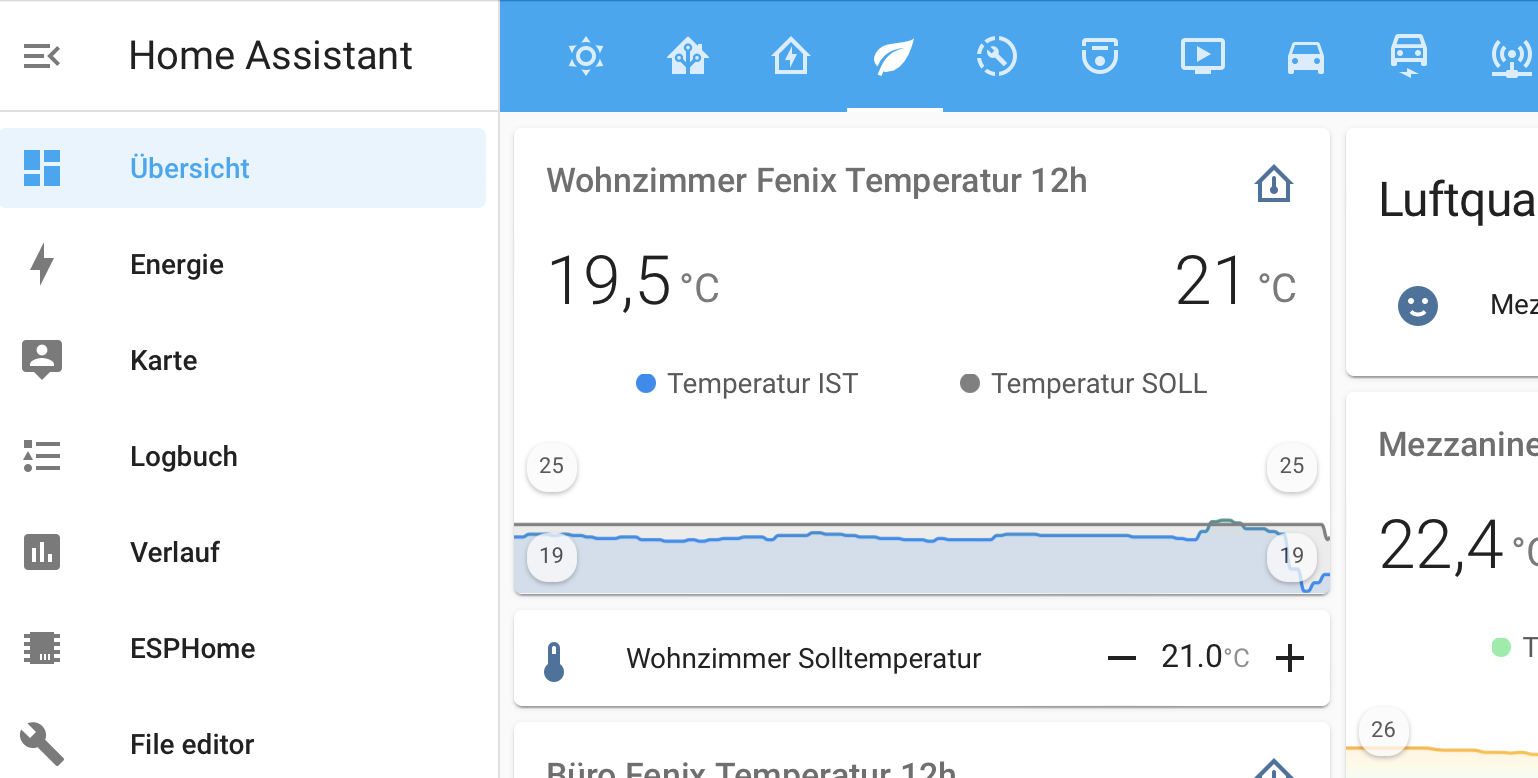
Depending on whether we have one or more Fenixes, we create new “Input Number” elements in configuration.yaml and restart Home Assistant:
input_number:
#Fenix Wohnzimmer Ambient Temperature
  fenix_wohnzimmer_ambient_temperature:
    name: Wohnzimmer Temperatur
    min: -20
    max: 100
    step: 0.1

    unit_of_measurement: °C
    icon: mdi:home-thermometer-outline
If you also want to have such a nice “plus / minus” input interface you need the “numberbox-card”. You can get it from the HACS Store as a frontend element.

This Lovelace element has the following config for me and I simply recreated the behavior from the Fenix app with the respective temperature ranges and temperature steps.
type: custom:numberbox-card
border: true
entity: input_number.fenix_wohnzimmer_setpoint_temperature
icon: mdi:thermometer
delay: '2000'
min: 5
max: 35
step: 0.5
speed: '500'
Node-Red
In Node Red, import the flow from below and move the imported elements into the flow where you have the remaining Fenix Thermostat elements from the previous article of mine.
The flow has a very simple structure:
The state_changed element(s) listen for a change in value in the Lovelace Dashboard (the element we created earlier in configuration.yaml and can display in the Lovelace Dashboard and change with the “plus/minus” buttons.
In my case there are two thermostats, therefore two state_changed elements. Each of these elements enriches the flow with its own msg.ID.
This msg.ID is the sensor/device ID of your Fenix thermostat. You should know it from the previous blogpost. Check it out and copy the ID here into the value field.
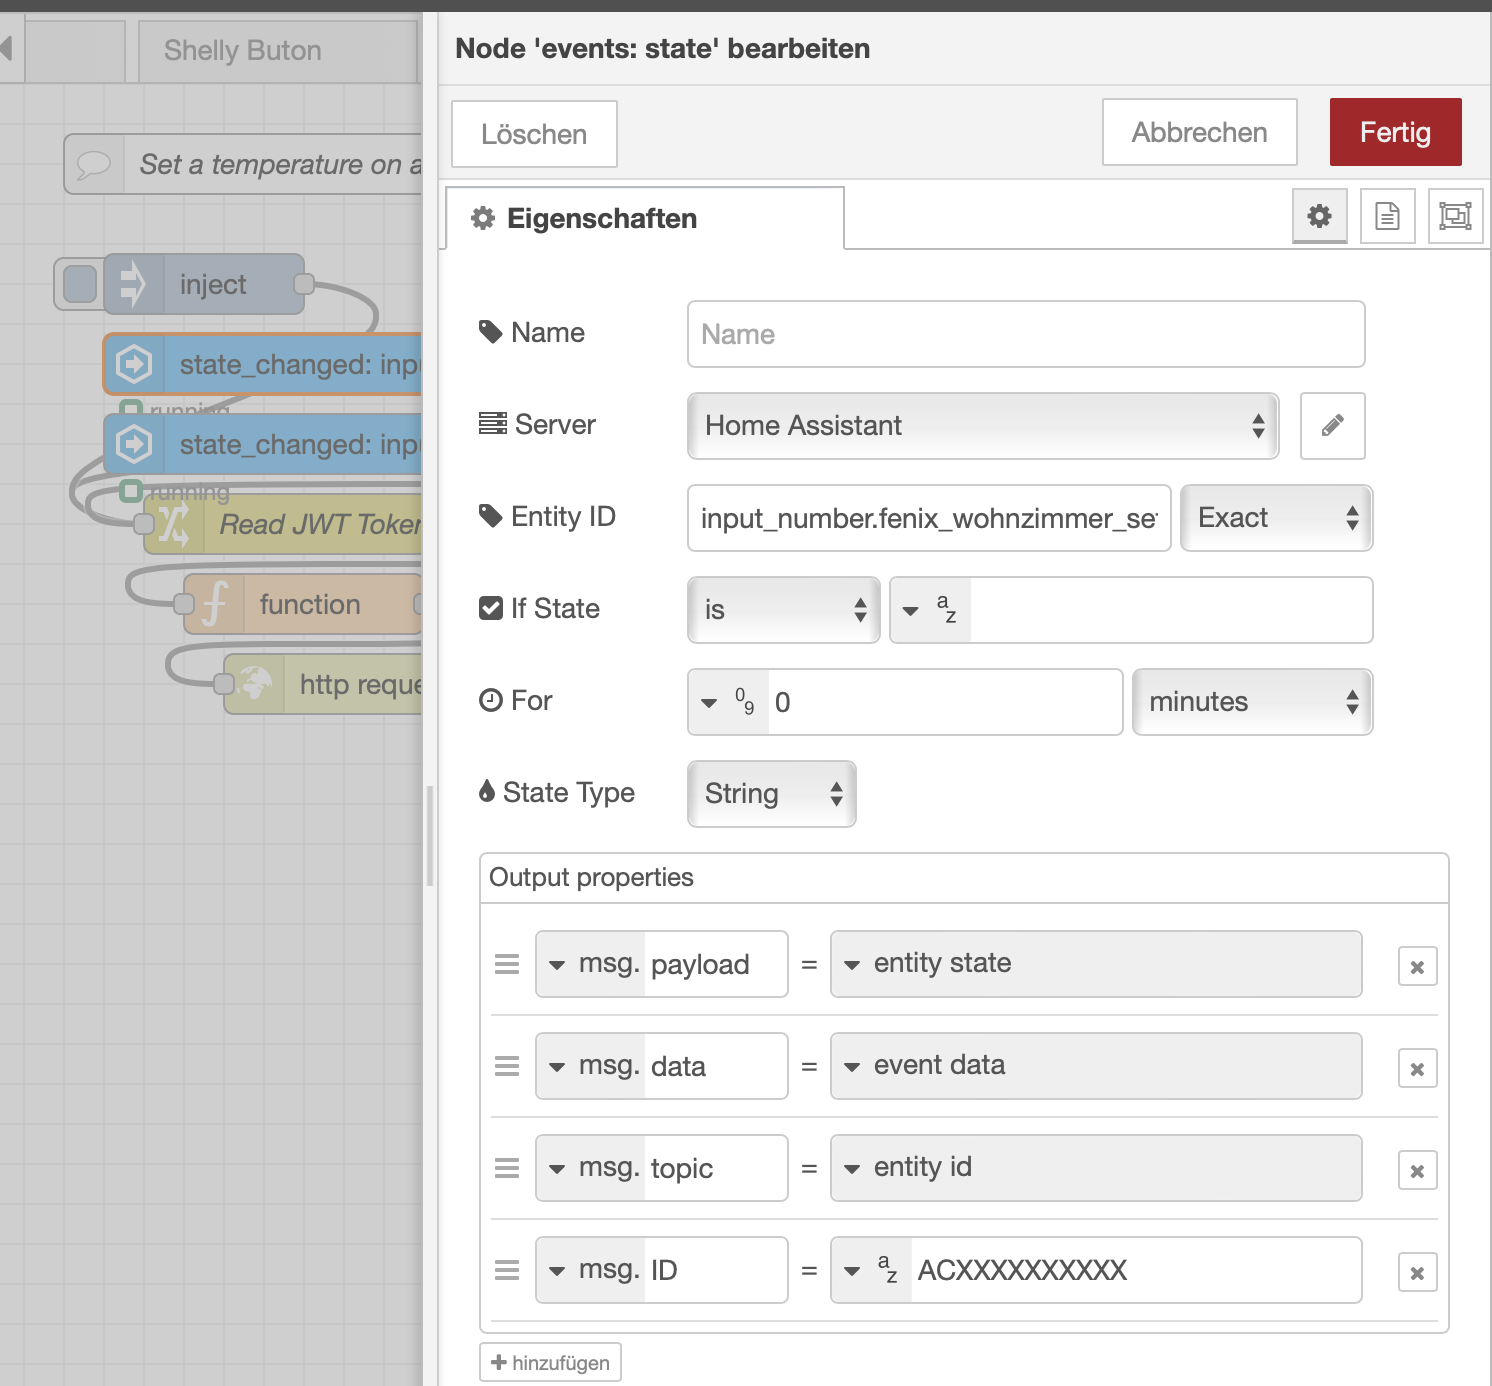
In the “Read JWT Token” we read the current JWT token and pass it as variable to the next function node.
Because the Fenix thermostats work internally with degrees Fahrenheit, we first calculate the Fahrenheit value from the degrees Celsius, multiply it by 10 and round it to have no more decimal places.
The Function Node assembles the HTTP request and passes it to the HTTP Request Node.
Do not forget Deploy 🙂
That’s it. Now you should be able to set the temperature via the Lovelace Dashboard.
Outlook
Now that we can set temperatures automatically, we can drive temperature profiles ourselves – time-controlled or event-controlled. In my case, it’s a floor heating system that is super sluggish and where a short temperature change is hardly worth it. But what is exciting is that the request with the “TypeValue=6” in the function Node presumably also controls the mode of the thermostat and so we can also turn the thermostat off or on. This is super exciting for me because my Fenixes hang directly on the front doors and when I ventilate or go out and in cold air comes to the thermostats and so they try quite quickly to restore a proper room temperature. This currently leads to a slight overheating of the rooms because only a bit of cold air passes, but the room itself already has the right temperature. So I want to use a door sensor to shut down the thermostat for 5 minutes after opening the door and then reactivate it. So I prevent that much energy is burned only because the thermostat has got some cold air.
Also, in the future, once we have a photovoltaic system, I want to pump excess energy into the floor and “overheat” the room a bit, if it is foreseeable that the outside temperature will be cooler in the next few hours anyway.
Node-Red Flow
[{"id":"6bd77a28216ae902","type":"tab","label":"Flow 2","disabled":false,"info":"","env":[]},{"id":"b1ec2a63571cfb39","type":"server-state-changed","z":"6bd77a28216ae902","name":"","server":"86110a77.f6e448","version":3,"exposeToHomeAssistant":false,"haConfig":[{"property":"name","value":""},{"property":"icon","value":""}],"entityidfilter":"input_number.fenix_wohnzimmer_setpoint_temperature","entityidfiltertype":"exact","outputinitially":false,"state_type":"str","haltifstate":"","halt_if_type":"str","halt_if_compare":"is","outputs":1,"output_only_on_state_change":true,"for":0,"forType":"num","forUnits":"minutes","ignorePrevStateNull":false,"ignorePrevStateUnknown":false,"ignorePrevStateUnavailable":false,"ignoreCurrentStateUnknown":false,"ignoreCurrentStateUnavailable":false,"outputProperties":[{"property":"payload","propertyType":"msg","value":"","valueType":"entityState"},{"property":"data","propertyType":"msg","value":"","valueType":"eventData"},{"property":"topic","propertyType":"msg","value":"","valueType":"triggerId"},{"property":"ID","propertyType":"msg","value":"ACXXXXXXXXX","valueType":"str"}],"x":310,"y":180,"wires":[["4dc344d45e940715"]]},{"id":"b6efbce1fd055cfc","type":"debug","z":"6bd77a28216ae902","name":"","active":true,"tosidebar":true,"console":false,"tostatus":false,"complete":"true","targetType":"full","statusVal":"","statusType":"auto","x":410,"y":320,"wires":[]},{"id":"99b3ebe0a6a7487a","type":"http request","z":"6bd77a28216ae902","name":"","method":"use","ret":"txt","paytoqs":"ignore","url":"","tls":"","persist":false,"proxy":"","authType":"","senderr":false,"x":190,"y":340,"wires":[[]]},{"id":"4ebd90952639ec27","type":"function","z":"6bd77a28216ae902","name":"","func":"//Calculate the Degree C in Degree F and round it for Fenix\nmsg.neuetemperatur = Math.round(((msg.payload * 9/5) + 32)*10)\n\nmsg.method = \"PUT\";\nmsg.url = \"https://vs2-fe-apim-prod.azure-api.net/iotmanagement/v1/devices/twin/properties/config/replace\";\nmsg.payload ={\"Id_deviceId\":msg.ID,\"S1\":msg.ID,\"configurationVersion\":\"v1.0\",\"data\":[{\"wattsType\":\"Dm\",\"wattsTypeValue\":6},{\"wattsType\":\"Ma\",\"wattsTypeValue\":msg.neuetemperatur}]};\nmsg.headers = {};\n//msg.headers[\"Host\"] = \"vs2-fe-identity-prod.azurewebsites.net\";\nmsg.headers[\"Content-Type\"] = \"application/json\";\nmsg.headers[\"User-Agent\"] = \"Watts.VisionSystem.Mobile/2101281503 CFNetwork/1329 Darwin/21.3.0\";\nmsg.headers[\"Accept\"] = \"application/json\";\n\nmsg.headers[\"Authorization\"] = \"Bearer \"+msg.token;\n\nreturn msg;\n\n\n\n\n\n\n\n\n\n\n","outputs":1,"noerr":0,"initialize":"","finalize":"","libs":[],"x":160,"y":300,"wires":[["99b3ebe0a6a7487a"]]},{"id":"4dc344d45e940715","type":"change","z":"6bd77a28216ae902","name":"Read JWT Token from the Flow Store","rules":[{"t":"set","p":"token","pt":"msg","to":"JWTtoken","tot":"flow"}],"action":"","property":"","from":"","to":"","reg":false,"x":230,"y":260,"wires":[["4ebd90952639ec27"]]},{"id":"cf2ebbece40e8400","type":"comment","z":"6bd77a28216ae902","name":"Set a temperature on a Fenix","info":"","x":160,"y":80,"wires":[]},{"id":"f90a101d633a1cbf","type":"server-state-changed","z":"6bd77a28216ae902","name":"","server":"86110a77.f6e448","version":3,"exposeToHomeAssistant":false,"haConfig":[{"property":"name","value":""},{"property":"icon","value":""}],"entityidfilter":"input_number.fenix_buero_setpoint_temperature","entityidfiltertype":"exact","outputinitially":false,"state_type":"str","haltifstate":"","halt_if_type":"str","halt_if_compare":"is","outputs":1,"output_only_on_state_change":true,"for":0,"forType":"num","forUnits":"minutes","ignorePrevStateNull":false,"ignorePrevStateUnknown":false,"ignorePrevStateUnavailable":false,"ignoreCurrentStateUnknown":false,"ignoreCurrentStateUnavailable":false,"outputProperties":[{"property":"payload","propertyType":"msg","value":"","valueType":"entityState"},{"property":"data","propertyType":"msg","value":"","valueType":"eventData"},{"property":"topic","propertyType":"msg","value":"","valueType":"triggerId"},{"property":"ID","propertyType":"msg","value":"ACXXXXXXXXX","valueType":"str"}],"x":290,"y":220,"wires":[["4dc344d45e940715"]]},{"id":"86110a77.f6e448","type":"server","name":"Home Assistant","version":2,"addon":true,"rejectUnauthorizedCerts":true,"ha_boolean":"y|yes|true|on|home|open","connectionDelay":true,"cacheJson":true,"heartbeat":false,"heartbeatInterval":30}]
Super useful for me! I was very frustrated that ‘smart’ thermostats can’t integrate with HA, but now they can. I have 11 of them in my house 🙂 and will have to put some effort to configure them the way I want, but as far it is working for one, I just need to repeat the process. I did very few modifications in order the flow to work for me – I will share once I’m done. For the guide is good enough – I have some experience with APIs, which probably helped me a bit.
I have a side question – have you tried to pull some data for the electricity consumption of a device? There is such an option in the App, but never return anything. I see also the API returns an empty body. Curious if it is the same with you?
https://vs2-fe-apim-prod.azure-api.net/dataProcessing/v1/metricsAggregat/consommation
Thanks for Sharing. I know on what position you struggled. Meanwhile Fenix changed something on the communication scheme but i haven´t updated my flow yet. It just got a bit less confusing now so i am happy they changed it.
On the other hand i couldn´t manage to get consumption informations via app and via API call. It seems to be broken. A year ago it sometimes worked but took ages so maybe the server load to extract the history data was to intense for them?
Hi Nikolay,
can you please share your work? It’s getting cold outside and I would like to really manage these “Smart” thermostats with HA.
Thanks!
Regards,
Lubos