
However, devices that only talk to their proprietary app have nothing to do with “smart home”. This is also the case with the Ecoflow Wave 2, which I could only make a real smart home capable device with a bit of effort.
The goal is to control the Ecoflow Wave 2 remotely and to be able to read out its performance data. The nice thing about this is that it is not particularly difficult because Node-Red and MQTT do a lot of the work for us.
Extract your access data
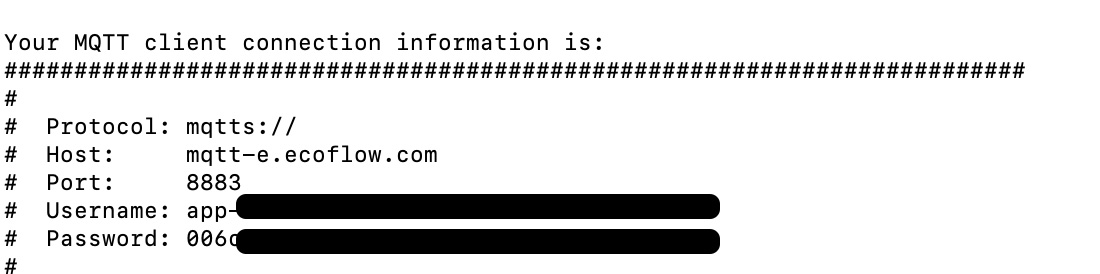
First we need our accesses with which we can subscribe to the MQTT broker of Ecoflow. For this there is this nice batch script. Run it, enter the mail address and password of your Ecoflow account and you will get some important data:
Remember: Protocol, Host, Port, Username and Password.
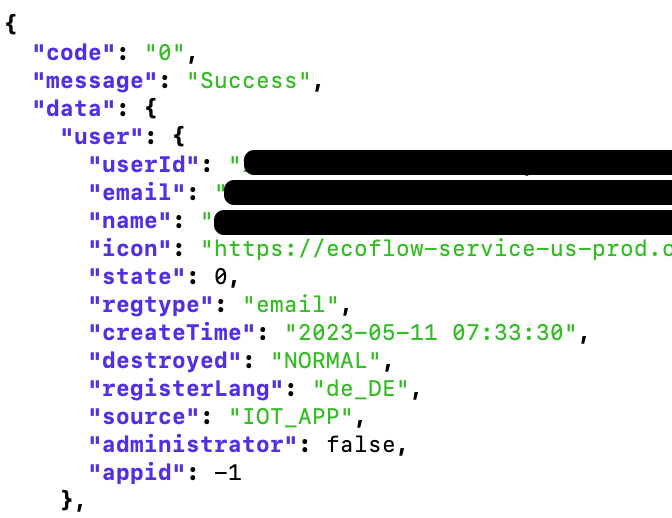
From this block you still note the “userId”:
What is still missing is the Serialnumber of your Ecoflow Wave 2, which you can find in the Ecoflow app under Properties –> Specifications. In my case it starts with KTXXXX….
Node-Red
Theoretically you can use any MQTT client like MQTTX to receive and send the data. Node-Red is my go-to program for almost any home automation logic. It is simple, clear and has found quite a good distribution.
Receive data via MQTT
Drag an “mqtt in” node into the workspace and configures it as follows.

Instead of the SERIALNUMBER you enter your own serial number at the path of the topic.

With the pencil icon at Server you create a new server to which you connect. Enter the following for Server:
mqtts://mqtt.ecoflow.com:8883 Set the protocol to MQTT V3.1 and compose your client ID as follows:
The word ANDROID is fixed. The UUID is a unique numerical value, which will be displayed in the batch script depending on the system. It didn’t work for me but you can take the following UUID and change it in a few places. Just don’t change the format and the length.
FF12A24A-B3D1-3719-9314-DF617C133742You know the USERID from the batch script.
ANDROID_<UUID>_<USERID>This then looks like this, for example:
ANDROID_FF12A24A-B3D1-3719-9314-DF617C133742_1234567890123456789
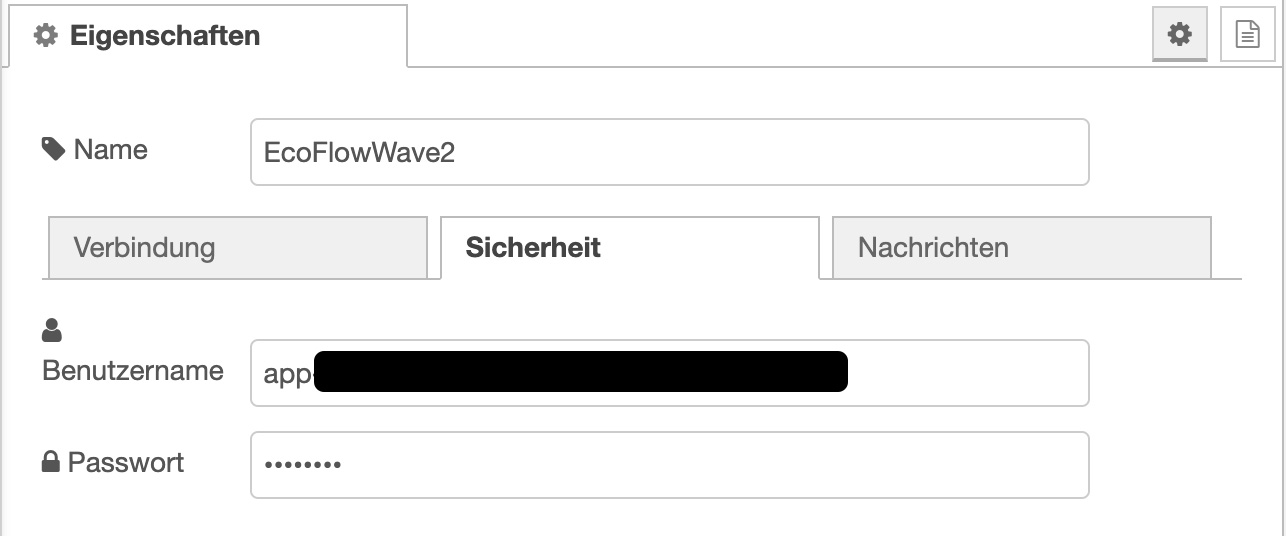
In the “Security” tab, enter your user name and password from the batch script.
The node is now ready and if everything fits it will have the status “connected”. Add a “Debug” node behind it and you will see that now e.g. temperature values are coming in.


You will see many different MQTT packages. Packages for the motor of the Ecoflow Wave 2, for the battery, for the power supply, for the settings of the Ecoflow, etc. I leave it up to you how to handle them. As a small tip, if you have a Home Assistant running: Install the Node-Red Companion integration via HACS and write the interesting values into the Home Assistant with the “sensor” node.
Send settings via MQTT
We can not only read values but also send them to the MQTT broker and the Ecoflow Wave 2 will respond.
On/Off
Now we come to the exciting, and very simple part. We switch the Ecoflow Wave on and off from Node-Red.
Put an inject, function and a mqtt-out node together like this:

Fill the Function Node as follows and adjust the serial number.
msg.payload = {
    "params":
        {
        "powerMode": 2
        },
    "from": "iOS",
    "lang": "de-de",
    "id": "188631149",
    "moduleSn": "SERIALNUMBER",
    "moduleType": 1,
    "operateType": "powerMode",
    "version": "1.0"
}

return msg;
The difference between switching on and switching off is the “powerMode”.
1=ON
2=OFF
The configuration of the mqtt-out node is still missing. The topic is composed as follows. Changes the USERID and the SERIALNUMBER.
/app/USERID/SERIALNUMBER/thing/property/set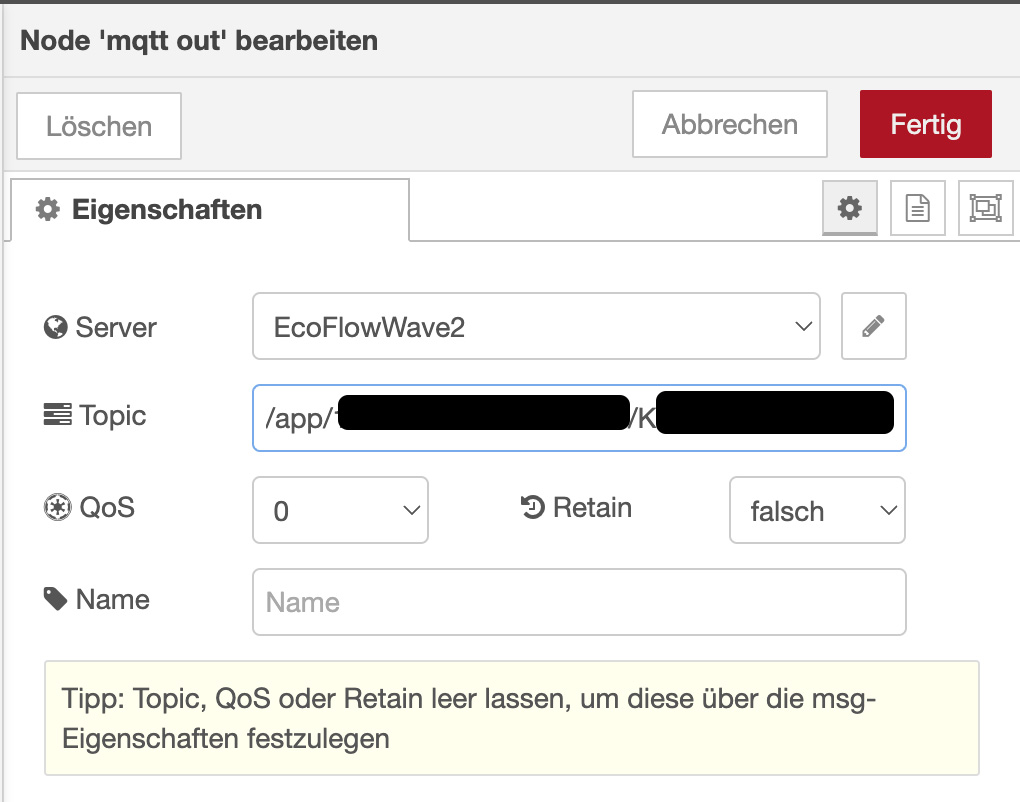
Depending on what you have set in the powerMode, your Ecoflow Wave 2 will now turn on or off when you press the Inject Node.
Change temperature
The mqtt-out node we just created can be reused for all further set-settings. So also for the temperature change. The function node for this looks like this:
msg.payload = {
    "params":
        {
        "setTemp": 20
        },
    "from": "iOS",
    "lang": "de-de",
    "id": "138638149",
    "moduleSn": "SERIALNUMBER",
    "moduleType": 1,
    "operateType": "powerMode",
    "version": "1.0"
}

return msg;
You can simply define the “setTemp” as a variable in Node-Red and the value for it can come out of Home Assistant, for example.

Easily create additional nodes for settings
These were two examples for the basic settings of the Ecoflow Wave2. Now it’s your turn to create the remaining application integrations yourself. How does that work?
It is very simple. With another “mqtt-in” node, which you configure as follows:
/app/USERID/SERIALNUMBER/thing/property/setIn this MQTT-Topic all settings which you set via the app, arrive. All you have to do now is attach the mqtt-in node to a debug node and you can watch in the debug window what happens when you make settings in the app.

This way you learn which commands are sent by the app. You simply rebuild these commands, as with the ON/Off or temperature node.
I hope this helped you to understand how the Ecoflow Wave (and also many other of ecoflows products) communicate via MQTT and how to control these functions from Node-Red.
Hey, this is exactly what I’m after however I’d like to try and do it all in Home Assistant to limit the overheads of having node red installed.
Could you perhaps list all of the commands you send and receive? I’m trying to work out what param is used to confirm the current power status of the Wave and also what commands to send to change the heating mode.
Are you perhaps able to export the relevant node red sections that have created your UI that i could look over?
Thanks for your work to date, it’s a really good write up!
scrap that last message, i somehow missed your idea of monitoring the set command whilst hitting different modes in the app. 🙂