The Philips 55pus6101/12 is only out of warranty for a few months and the first signs of failure have appeared. Little by little, more and more bright dots appear on the screen. The problem can be solved very cheaply but it requires a lot of tact. With a tip, which you will get at the end, the result is probably better than mine. Because lessons leaned.
The first white halo 
several more come by
This is a known problem (also for other manufacturers) and is due to a material defect in the backlight. The panel is illuminated from behind with LEDs. To prevent the LEDs from appearing as dots, diffuser caps are placed on the LEDs to disperse the light evenly. In the case of the Philips PUS TV, these diffuser caps are glued directly to the PCB over the LEDs and here Philips probably used a bad glue which starts to get brittle over time. The diffusors simply fall off at some point. Probably only a few cents difference between a good glue and the glue Philips used.
Careful, this is not a complete guide. I’m just picking out a few specialties here. Models may differ from one another. You do this at your own risk.
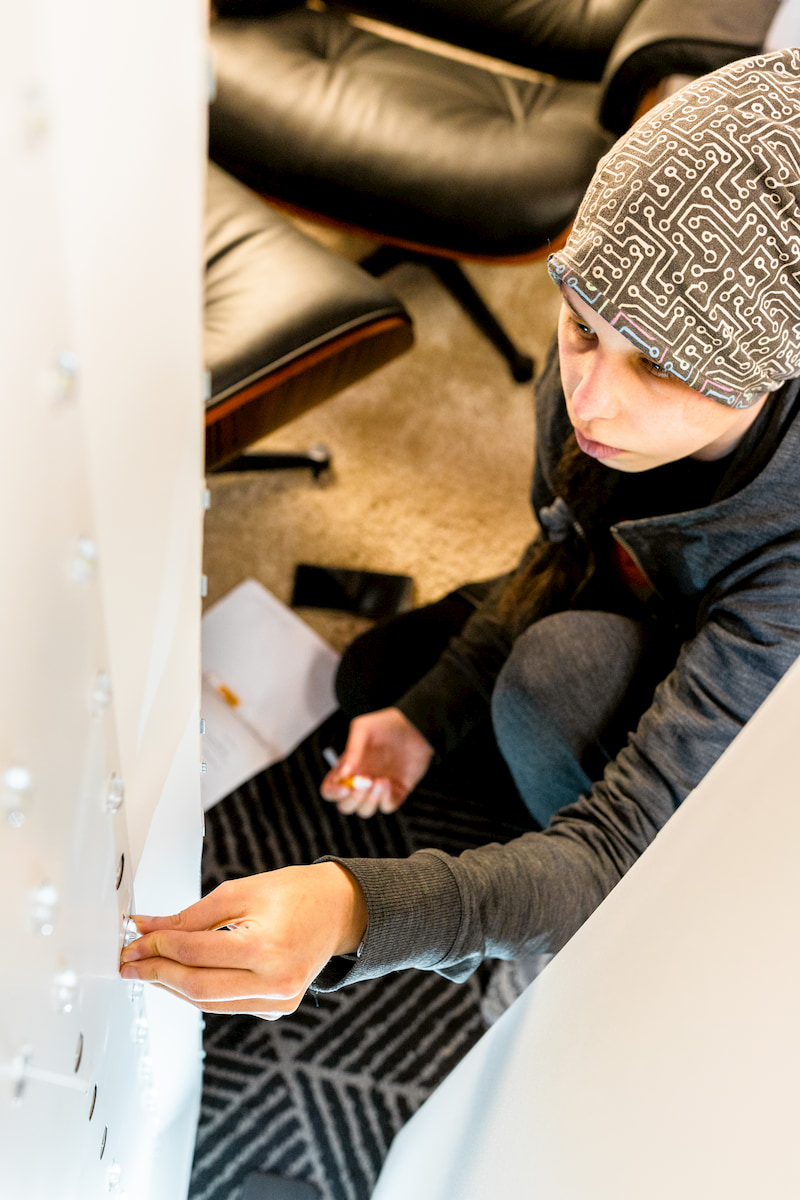
I have never disassembled a television set before but it is not really that difficult. The unit is placed on the floor with the panel down and all visible screws are loosened at the back. There is a maintenance flap through which you can remove a plug. This is the control of the small joystick on the back of the TV.

Once the plug is disconnected, the rear cover can be removed. The device can now be placed on its back. So that the electronics are not lying on the floor I have turned screws into the Vesa holder as a spacer.
Now the black frame of the TV is released. This frame holds the metal housing and the panel together. Loosen the many small screws all around.
As soon as the frame is gone, only a mask with small retaining lugs holds the panel to the metal housing. These can be removed carefully all around. Except the side from which the panel is controlled. Here you cannot reach all the lugs. But that is not bad. You can still fold the panel far enough away to get to the inside.
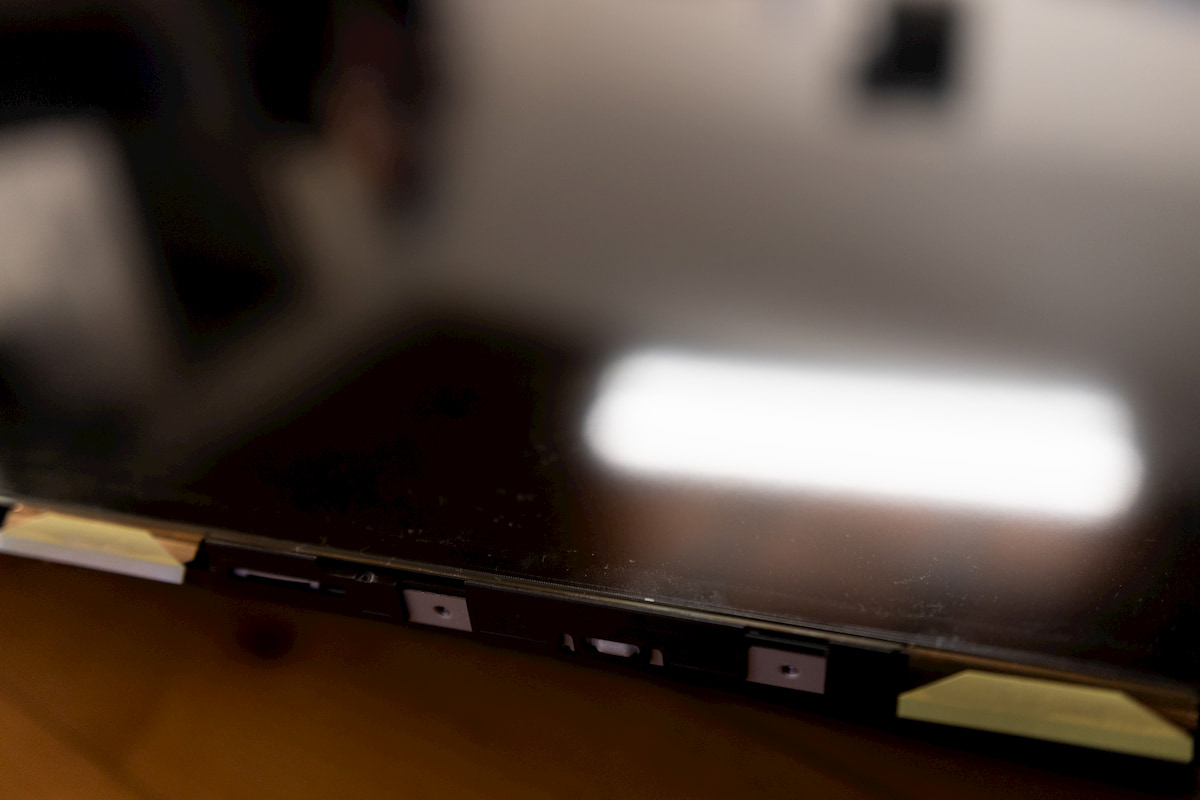
We put the device upright and folded away the panel together with the diffuser foils in a V-shape with a 45° angle.

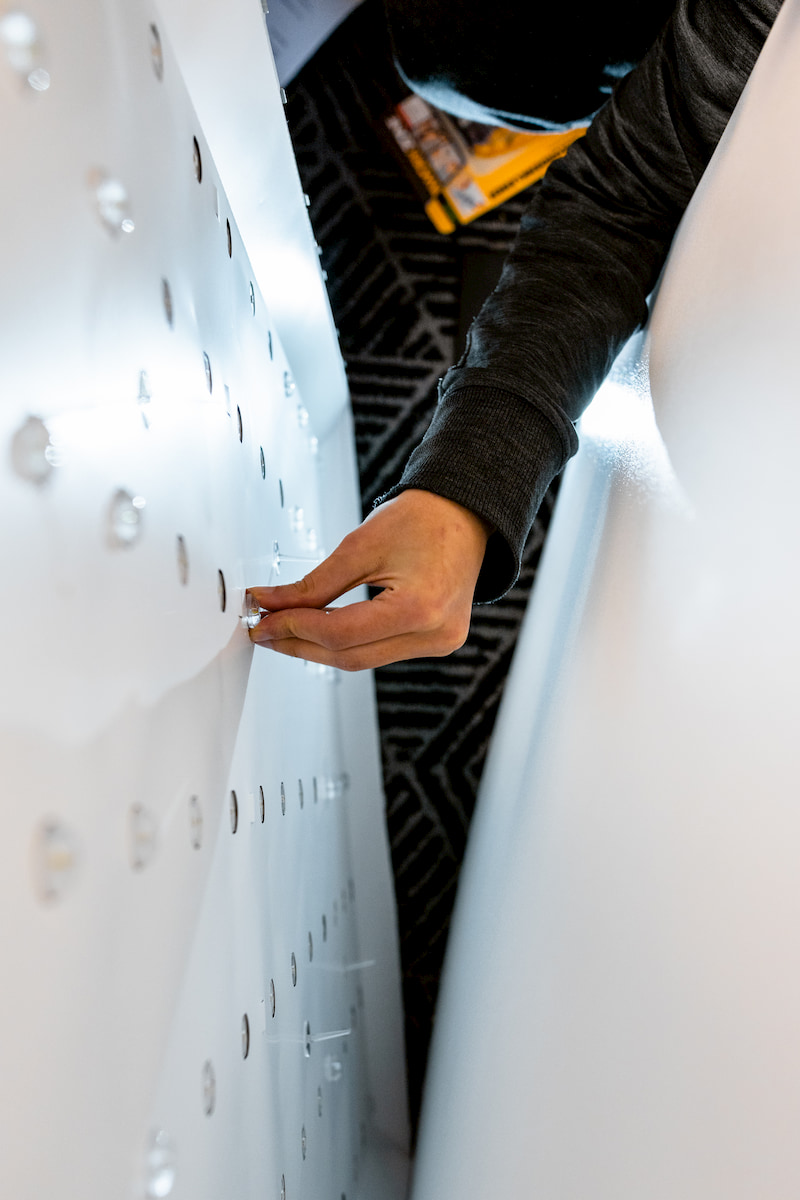
Now you get to the backlight and 6 of the diffusers are already rolled out.

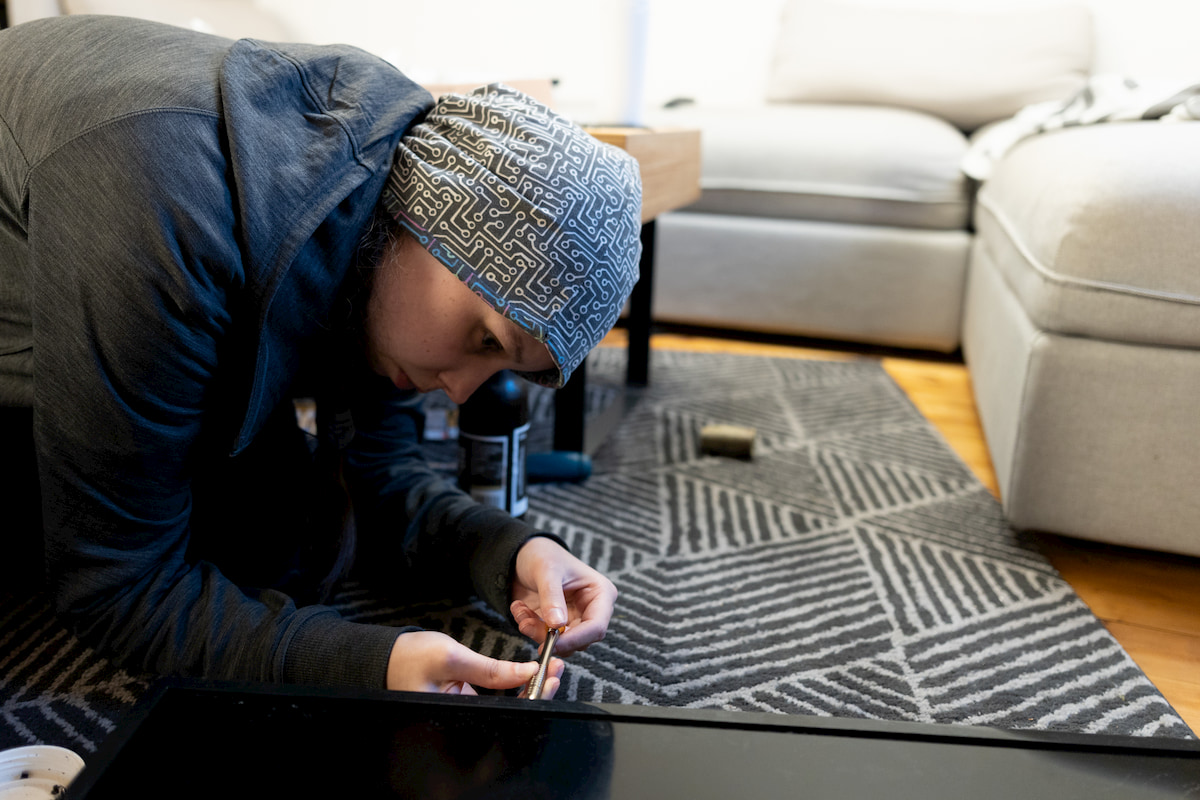
Many of the other diffuser caps could be removed with a simple touch of a finger and fell off. We also decided to remove the remaining caps and reglue them. A “mistake” as it turned out later.
We have reglued the diffusers with this glue.
In the end everything reassembled and voila, the TV even works.
Unfortunately, it turned out that the diffusers are extremely sensitive to the correct fit and some of them were probably not 100% centered. So the trick is not to remove all diffusers and glue them again but to strengthen those that are still halfway in position and only glue those that have fallen off again, making sure that they fit exactly.

With “plane” bright surfaces the points are best seen. In a normal moving image, however, they are hardly noticeable. But it is much better than without the diffusers. I am quite satisfied with the result. So the device just keeps running in the guest room and doesn’t have to be thrown away.
DON’T TRY THIS WITH YOUR TV!!!!
We had the same problem, there were around 20 white halos and we tried to fix it step by step like in the article. We were very careful, did everything according to the article and once we glued diffuser caps (we had to glue almost ALL OF THEM! 98 in total!) and closed the TV and turn it on, we were so angry. The TV is completely destroyed! There are a lot of horizontal and vertical lines, huge black dots and one part of the TV is completely black! We cannot watch and read anything!! 4 hours of trying to fix it wasted!!!
The article makes it look very simple but it’s actually very easy to do something wrong even if you’re careful. We regret doing it in the first place!
I´m sorry it did not work for you. As i wrote, this is at your own risk and not a complete guide. I think i pointed it out that this is not a complete guide and the results are depending on your accuracy of gluing the lenses on the right spot.
Had the same problem, followed the steps and everything is good as new. Thanks a lot for sharing this! I only put back the two diffusers that had fallen and they seem to be perfectly in the right place. I was very careful about the positioning though thanks to your warning, and I’m guessing it’s easier to perfectly align them if you’re only dealing with two and not all 90 of them.
Careful people though, as the author has stated this isn’t a complete guide, you’ll have to figure out a few things on your own. So maybe don’t attempt this if you’ve never disassembled any kind of electronics. Otherwise just got to be careful as always with stuff like this and it should work out!
It is working. Thank you.
I have only one spot and I manage to repair.
Thabk you
I did this, it worked, but I have the same lack of light uniformity.
I also have a theory: I don’t think it’s improper lens placement that’s causing the light distortion. I think it might be skin oils left behind on the edges of the lenses.
Out of 84 lenses I needed to re-glue 80, I think; the other 4 were already rock-solid. (Once I removed the dried glue from each lens and the place where it had been glued, it was easy to look through the top of the lens to centre each one over its LED.)
Yet now, looking at the TV, I’ve got 84 similarly distorted spots on the TV – including the 4 lenses I only checked for looseness.
This leads me to believe that touching the lenses was enough to cause the distortion; if I were willing to open the TV back up again, I’d bet cleaning every lens, especially around the outer edge, would mostly resolve the issue.
I’d love to see somebody try this repair while wearing gloves. I bet it would go off without a hitch.
Following your instructions and this https://www.youtube.com/watch?v=RmsP0E3op_4&t=467s , I successfully fixed the white halo spots. Thank you very much.
Thanks, this post saved my TV, no more bright spots. The job isn’t too hard, but you need to be extra meticulous to succeed.
I read through the post and did manage to repair the white spots, I was focused and exact and the lenses were glued pretty much accurate.
However, I did break the screen because I pressed too hard on one corner when assembling it back – so a new TV will be required.
Thanks so much for this blog.
We tried to save a TV which was going to the landfill, but in the process of getting it home it started to make about as much noise as a Lego box.
After installing we saw bright spots as well as strange circles at the bottom.
we found your blog and it gave as the confidence to try the repair and we reglued about 30 of the lenses. We used a general gel super glue which worked pretty nicely (we applied on the three corners, those have the best glueing surface).
our TV currently looks really nice again and we’re proud to have saved it from the garbage twice now 😁.
Thanks so much!!! Our TV had two spots. However when opening another 20 came lose. Without any force almost all came of right away. I choose to glue all of them again. The result perfect! So, if you just align them carefully by the eye, all will work out great. As I read above, reinstalling the panel is a sketchy job, you need to lift from both side towards the middle (the wife helped out great :). If you bend to much it will definitely break.
Happy to have prevented e-waste!!